- Home
- Your Boats
- Cabin Trunk
Building a Cabin Trunk.
If there is one thing worse than a cabin that leaks, it is one that looks like a box.
While it is worth taking pains over the caulking of joints to make them watertight it is just as important to take care over the shape and looks
The structure also needs to be strong enough to withstand whatever the elements throw at it and to take the weight of crew members walking on top.
Oh, I'm just remembered, there is one type that is the worst of all and that's a nasty, fiberglass cuddy dripping with condensation.
Cabin to Deck joints

There are two methods of fixing the cabin-trunk to the deck .
- Inside the carlines , in which case the callings will need to be shaped or canted to conform to any tumblehome.
- On top of the deck, fixed to a sill which is through bolted to the carline .
There are many variations on both methods.
The first method will make for a neater finish on the inside but will be more prone to leaks and the carlings will require shaping before fitting.
The second method should make for a dryer interior and be simpler to construct.
affiliate linksShape.
A simple box shaped trunk is simplest form to construct.
However, that box will ruin the look of even the most elegant hull.
A well shaped cabin-trunk will on the other hand enhance the appearance of any hull shape.
Much of the shaping is needed to counter the optical illusions created by building on a shapely hull and deck.
Sides which are vertically built on a sloping deck will appear to slant outwards.
So the sides need to be built slanting inwards towards the top, just a few degrees is all that is needed to offset this optical illusion.
Many boats however are built with a more pronounced tumblehome.
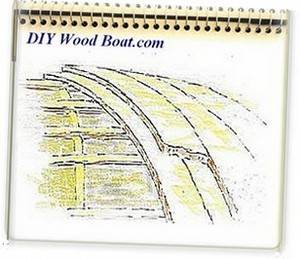
A flat horizontal roof will appear to be hogged, and look hump backed.
So a small amount of sheer curve is needed and the top will look much better if it slopes slightly up towards the stern.
And a curved top to the cabin will not only look good but drain water away much more quickly than a flat top.
The sides also need to curve in a horizontal plane to reflect the curve of the hole not only for looks but to allow for usable side decks.
Some of the most elegantly beautiful designs have only very subtitle amounts of sheer, tumblehome and curve.
It does make for extra work but the finished look will be very much worth the effort.
affiliate linksSides.
The sides, front and back of deck-houses were traditionally built from solid planks of wood.
This is an excellent method particularly if you want a bright natural finish.
However, it does have its drawbacks.
First there is the problem of finding suitable full length planks of sufficient width.
Then, there is the problem of bending the plank to fit the fore and aft curve of the carlines .
Because there is the possibility of warping any wide planks will require vertical stiffeners or drifts run through the width of the plank.
When I came to renovate Mignonne's
cabin-trunk, the solid mahogany sides had not only bowed but there were one or two longitudinal splits.
The splits were treated by forcing a gap filling glue into them with a fine blade fortunately they were not wide enough to need filling.
To correct the bowing I through bolted 2inch by 1 inch decorative uprights on the inside with thinner slats on the outsides.
Panels
can be made up using tongue and groove or splined, but the joints will have to be perfect and well glued to avoid the danger of splitting.
Another method which has successfully been used to build trunk sides is strip planking.
This can look rather good if done properly.
However, getting it right is rather complicated, and the port-light openings cannot be cut until afterwords.
Plywood
is the easiest material with which to build and can be most satisfactory.
Just remember that if you spend a lot of time and effort building that cabin you want it to last, so use Marine grade ply and seal the edges especially around any openings such as portlights.
The thickness of the ply you can use will depend on the amount of bending you need to do.
Trying to bend plywood thicker than ½ inch over a short distance will be difficult and it will induce stresses which could result in damage.
Laminating the sides from ¼ inch ply will be much easier and result in a stronger panel.
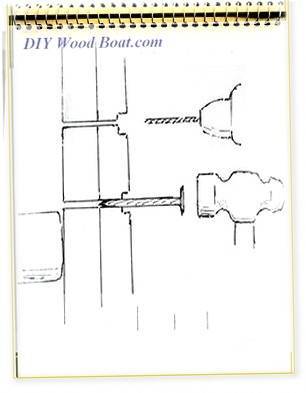
Corner posts.
 Cabin Corner posts.
The next problem is how to join the corners.
It is possible to make a 'box' with simple butted corners but this wont be very strong, any exposed end grain will be prone to rot and it will look cheap.
The preferred method is with a nicely radiused, rabbeted corner post.
The best posts are made from a solid piece but this can be tricky as you will have to allow for any desired tumblehome.
It will be much easier to laminate them up from two separate pieces.
The lower end of the post will have to fit the carling and beam and be beveled to allow for the tumblehome.
The top will need shaping to conform to the slope of the top.
Leave some extra material on the outer radius so that it can be fared to the sides after construction.
Roof.
 Angled Cabin Corner posts.
The cabin-top is another area where the traditional cambered look combines looks withfunction.
But again a certain amount of subtlety and compromise is required.
Too much camber while it will allow more standing headroom below will tend to look too much like a barrel.
And any force pushing down, such as foot traffic will have a tendency to force the cabin sides outwards. This is why church builders had to resort to the flying buttress.
So, a gentle curve well supported at the ends and with supporting beams in-between.
It is unlikely that you will have access to sufficient lumber with the grain running in the correct curve so, forget about sawn beams.
Well made laminated beams can be an extremely attractive overhead feature.
And a cabin-top laminated up from layers of ¼ inch marine grade plywood will have great multi-directional strength.
Mignonne's main cabin had originally been covered with tongue and groove boarding which, had then been covers with canvas.
As the boards, once they were cleaned up looked rather attractive on the inside I retained them but covered the whole on top with painted plywood.
On the aft part which, I had to rebuild I again used tongue and groove as the first layer, for its decorative effect then laminated plywood on top.
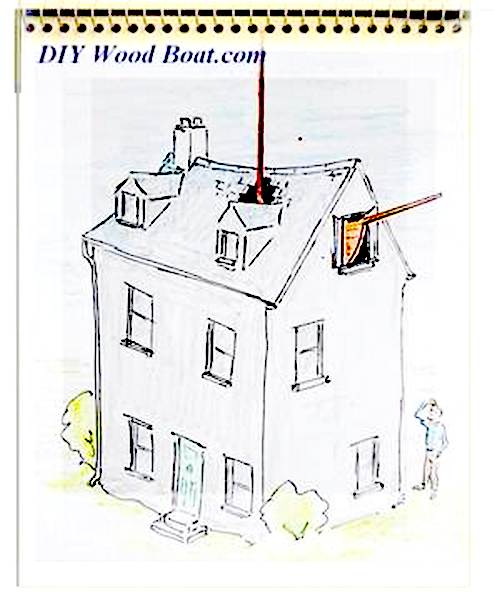
Whether you are modifying, restoring or building from scratch, do take pains over the design of the superstructure, dog house or whatever you build on top.
An ugly, boxy, dog kennel stuck on top of an elegant hull will draw everyone's eye including the owners.
I have seen too many that I would love to take a chain saw to.
A well designed cabin will enhance the beauty of any wooden boat and enhance the owner's pride.
Previous posts
See What Others Have Posted
Supporting the cabin top
The curved beam that supports the cabin top from the underside (inside the boat)split.
Epoxy has been put to seal the gap caused by the split.
…
Cabin top beams and Deck beams
I am building a 29' stitch and glue cruising sailboat and I plan on having traditional looking deck beams and cabin top beams laminated from mahogany and …
Interior finish over stain
I'm curious about opinions on an interior finish over a stain.
Varnish or Oil?
Which would you elect from a maintenance/upkeep stand point?
…


"Never test the depth of the water with both feet."
You might like these
Boat Books for Wooden Boat Builders
Boat Books a series of boat books based on some of the 1960's, classic, Free Boat Plans that were published in magazines such as "Popular Mechanics", "Popular Science" and the "Boat Builder Handbook".
Ring Nails for Marine Fastening.
Ring Nails sometimes call Gripfast or ring shank, silicon bronze boat nails are renowned for their holding power. but how to get them out?
The Ashcroft Method of Planking a Wooden Boat
The Ashcroft method of building small wooden boats, an early from of cold moulding using thin layers of wood with the layers all running same direction.
Knotty wood, problems with boat building timber.
Knotty wood, how to avoid structural problems with knots in lumber when using softwood timber for fitting out and boat joinery
Build a Boat, tips for the DIY Wooden Boat Builder.
How to Build a Boat, Wooden Boat Building methods for the DIY, backyard, self-builders explained, carvel, lapstrake and plywood
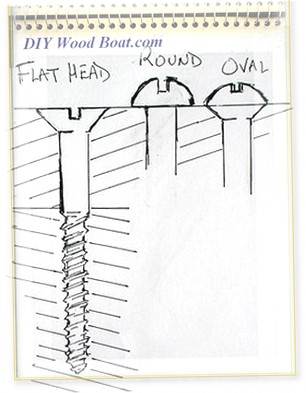
Wood Screws for Boat Building and Repair.
Wood Screws are the most widely used and versatile fasteners used on wooden boats. Which type to use and how to use them
Wood, Environmentally Friendly Boat Building Lumber.
Make sure that the Wood that you buy and use is sustainably grown and harvested.
Timber, Lumber for Boat Building.
A brief description of the most common Timber used for building Wooden Boats how to choose wood for your project boat
Timber Properties
A brief guide to timber properties and wood, characteristics such as strength, stiffness and elasticity for choosing lumber for wooden boat building and restoration.
Rivets and Copper Rove Wood Boat Fastenings.
How to use Copper Rivets and Roves construction guide to fasteners on your wooden boat.


Recent Articles
-
Reader's Boat Photos
Aug 23, 25 09:08 AM
 Gallery of Readers uploaded Photos
 -
The Sliding Bevel
Jun 19, 25 02:52 AM
 By Robin Gates
The Sliding Bevel: A Boatbuilder’s Tool for Precision
For angles other than the perpendicular of the try-square and 45 degrees of a mitre-square, the essential measuring tool is a slidin…
-
Winter Bilge Issues
Jun 18, 25 07:34 AM
 By Adrian Morgan
Winter Bilge Issues: Can a Classic Boat Spend Too Long Ashore?
Beware the score of too long ashore, Adrian Morgan warns us…
Continue reading "Winter Bilge Issues"
You might like these
Wooden Boat Restoration, Repair and Maintainence.
Wooden boat restoration, how to fix up an old wooden boat, one of the cheapest ways to get afloat and have a boat to be proud of.
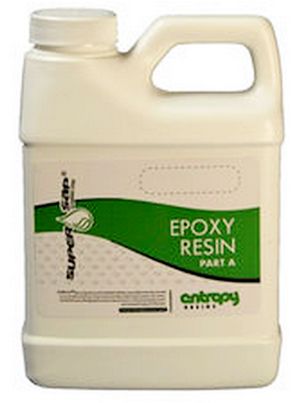
Epoxy Resin for DIY Wooden Boat Building.
A guide to the epoxy resins and sustainable enrtopy resins to use when building wooden boats with marine plywood.
Wood Rot Repair and Treatment
Wood rot in wooden boats, how to treat, repair and replace rotten timbers in a wooden boat
Vintage wood Boat Bottom Replacement
The ultimate bottom repair for a vintage wood boat, when re-caulking the planking on your classic antique boat
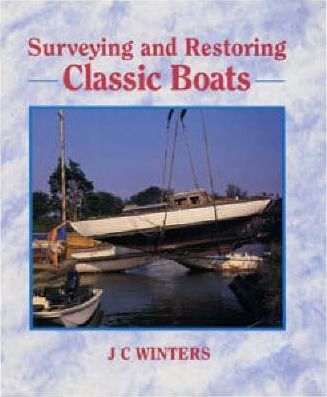
Surveying a wood boat
The problem areas to look out for when surveying an old wooden boat.


This work is licensed under a Creative Commons Attribution-ShareAlike 2.0 UK: England & Wales License.
I am perfectly aware that the majority of Wooden Boat aficionados are sensible folk.
However, I need to point out that I am an amateur wooden boat enthusiast simply writing in order to try to help other amateur wooden boat enthusiasts.
And while I take every care to ensure that the information in DIY Wood Boat.com is correct, anyone acting on the information on this website does so at their own risk.