- Home
- Your Boats
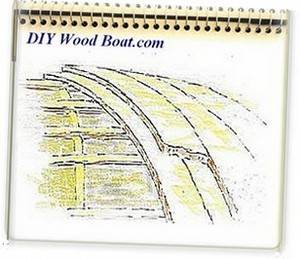
- Rivets
Copper Rivets and Roves.
Copper Rivets and Roves have long been a favoured fastening method in boat construction.
There are many advantages to using a copper nail and rove.
- Copper has good corrosion resistance especially when the head is protected from moving water with a bung.
- The flat heads are less likely to cause splitting of the wood and the area under head can easily be increased with washer/rove.
- Because of their superior withdrawal resistance the holes in the wood can be smaller.
- They are cheaper to buy than screws or bolts.
- They can be replaced using the same hole or just one size larger,
The Nail and Rove.
The most usual copper nail for riveting is square in cross section with a diamond point and flat head.
They can also be bought with a proud or rosette head.
Common copper nails with a
smooth shank and a flat copper
burr are also sometimes used.
The rove is a dished copper washer.
The rove should be slightly under sized so it can be driven tightly onto the nail without falling off.
Copper Nails are manufactured to the wire gauge, the higher the number the thinner nail.
And they are normally sold by weight.
Tools.
There are only a few, simple tools needed.
Although they can be purchased from specialist suppliers the dollies can be easily made at home and the rest are standard handyman’s tools.
- A drill with a bit one size smaller than the nail diameter, for boring the pilot holes.
- A ball-peen hammer, this doesn’t have to be large as you wont need a lot of force.
- Side cutting pliers or nippers, for nipping off the excess nail.
- The ‘bucking iron’ or holding iron is a solid, cylinder of metal, the flat end should have a slight chamfer .
This could be the head of a sledge/lump hammer, a piece of propeller shaft, or even a large bolt if the nails heads are not countersunk.
For counter-bored nails it will either need a stud or tip protruding from one end or be tapered to fit the counter-bore.
The rove iron or set is rather like a large nail set which has a countersunk hole drilled in one end.
It is used to drive the rove down over the nail.
This can be simply made from a piece of heavy rod with a hole
to
suit nail size, drilled down one end and countersunk to fit the rove.
You might also want some hearing protection as peening rivets can be a noisy affair.
affiliate linksGetting started.

The first job is to tightly clamp the pieces to be joined.
Although the riveting process will draw the pieces together it is best to have them tight to start with, this will also prevent the pieces from backing away while you drill.
If you are replacing an old fastener, replace an adjacent rivet with a bolt to draw everything together.
Next, drill the pilot hole, one size smaller than the nail size.
Tap the nail through the pilot hole with the hammer while holding the bucking iron at the back.
Holding an iron to the inside next to the pilot hole will prevent damage to light construction, this may not be necessary on heavier constructions.
The end of the nail should be left protruding by at least ¼ inch 6mm, preferably longer.
Whether you finish off each nail as you go or not is up to you however, if the boat is being built upside down you may not have a choice.
Leaving the finishing off to last will mean having to work around all those spikes.
To fit the rove, the bucking /holding iron needs to be held against the head of the nail.
The rove is then ‘set’ using the rove iron or set and hammer to drive it down over the nail.
The protruding part of the nail is then nipped off close to rove.
Peening the Rove.

With the bucking iron braced against the knee or thigh hold it against the nail head, then peen or chase the rove.
Peening only requires a three or four hammer hits with the ball of the hammer around the side of the rove.
Then finally, two or three whacks on the nail end to flare the metal, then finish off with a few light taps to round it off.
Beware of too much hammering as this will only harden the metal, causing the peened end to crack.
Harden up old fasteners only takes a couple of whacks on the rivet while holding the bucking iron to the nail head.
It is probably due to this simplicity and the speed of insertion that the copper nail and rove has remained such a popular method of fastening.
Herreshoff’s Rules for the Construction of Wooden Yachts

Previous posts
See What Others Have Posted
Riveting Comments
Very clear and accurate description of copper nailing.
The only thing you forgot was the tedium involved if you rush ahead and leave the fastening …


You might like these
Boat Books for Wooden Boat Builders
Boat Books a series of boat books based on some of the 1960's, classic, Free Boat Plans that were published in magazines such as "Popular Mechanics", "Popular Science" and the "Boat Builder Handbook".
Ring Nails for Marine Fastening.
Ring Nails sometimes call Gripfast or ring shank, silicon bronze boat nails are renowned for their holding power. but how to get them out?
The Ashcroft Method of Planking a Wooden Boat
The Ashcroft method of building small wooden boats, an early from of cold moulding using thin layers of wood with the layers all running same direction.
Knotty wood, problems with boat building timber.
Knotty wood, how to avoid structural problems with knots in lumber when using softwood timber for fitting out and boat joinery
Build a Boat, tips for the DIY Wooden Boat Builder.
How to Build a Boat, Wooden Boat Building methods for the DIY, backyard, self-builders explained, carvel, lapstrake and plywood
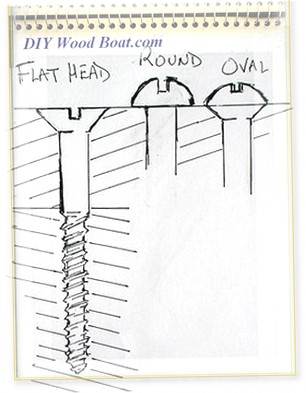
Wood Screws for Boat Building and Repair.
Wood Screws are the most widely used and versatile fasteners used on wooden boats. Which type to use and how to use them
Wood, Environmentally Friendly Boat Building Lumber.
Make sure that the Wood that you buy and use is sustainably grown and harvested.
Timber, Lumber for Boat Building.
A brief description of the most common Timber used for building Wooden Boats how to choose wood for your project boat


Recent Articles
-
Reader's Boat Photos
Aug 23, 25 09:08 AM
 Gallery of Readers uploaded Photos
 -
The Sliding Bevel
Jun 19, 25 02:52 AM
 By Robin Gates
The Sliding Bevel: A Boatbuilder’s Tool for Precision
For angles other than the perpendicular of the try-square and 45 degrees of a mitre-square, the essential measuring tool is a slidin…
-
Winter Bilge Issues
Jun 18, 25 07:34 AM
 By Adrian Morgan
Winter Bilge Issues: Can a Classic Boat Spend Too Long Ashore?
Beware the score of too long ashore, Adrian Morgan warns us…
Continue reading "Winter Bilge Issues"


This work is licensed under a Creative Commons Attribution-ShareAlike 2.0 UK: England & Wales License.
I am perfectly aware that the majority of Wooden Boat aficionados are sensible folk.
However, I need to point out that I am an amateur wooden boat enthusiast simply writing in order to try to help other amateur wooden boat enthusiasts.
And while I take every care to ensure that the information in DIY Wood Boat.com is correct, anyone acting on the information on this website does so at their own risk.