- Home
- Your Boats
- Boatbuilding Tips
Boatbuilding Tips for Amateurs
For any amateur, one of the best boatbuilding tips is to aspire to producing an excellent finish on your boat.
Challenge yourself, right from the start, to work to the highest standard of finish that you can, even on the parts that will be hidden from view.
A boat that looks good, in all it's details, will give you more pride and draw more admiration than one that is too obviously an amateur build.
So, go on, take your time, aim to surprise even yourself.
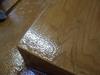
Sanding Wood
It easier to get a good finish on paint or varnish if you spend time getting a smooth (matt) finish on all the bare wood right from the start.
And it is easier to get the wood as smooth as possible right from the start as you are cutting the pieces, before assembling them into the boat.
Now by a smooth surface I do not mean a shiny one but one that has been sanded with a fine grit paper.
That matt surface will take a finish coat better than a shiny smooth one.
Once you've finished rubbing down get rid of the rubbing-down dust, it will cause problems if it's not removed.
Sanding dust will block the pores of the wood, reducing penetration of any coating.
A boatbuilding tip for surfaces that are to be glued, they can be left slightly rough or even clean-cut but special care should be taken to remove dust, good penetration is needed to ensure a strong bond.

117 page, step by step instructions for building the PM 38 using modern plywood building techniques and materials. Yours to download (pdf) for
only $10

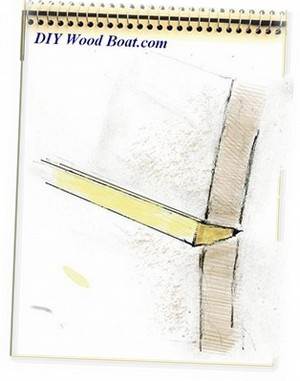
Round off Angles
Paint, varnish etc. are allergic to sharp corners.
So, round off the exposed corners and angles in the wood.
Paint, varnish and epoxy will be pulled away from hard edges by surface tension, leaving those edges with minimal cover and protection.
Rounding them off is boatbuilding tip that will allow a coating to adhere better, spreading itself evenly around the corner.
This will give a smoother finish and a more constant thickness thus giving maximum protection.
And it looks much nicer when the appearance of your boat is softened by removing the visual harshness of the sharp corners.
Those sharp corners can cause damage to skin and bone if fallen against, as well as wear and tear and chafing on items of boat equipment due to constant movement at sea.

73 page, step by step instructions for building the Redwood Canoe using modern strip planking techniques and materials
Everything you need to know from building to launching, yours to download (pdf) for
only $10
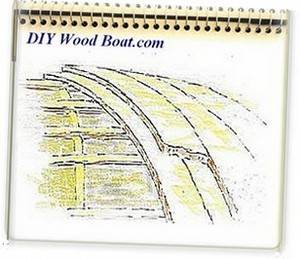
Fairing Glassed Edges
Rounding the corners of the wood before glassing will help reduce the need to sand those corners too much after glassing.
Too much sanding on fiberglass corners is a major cause of overlay cracks.
However, if the boat that you are building has glass taped joints or areas that are reinforced with fiberglass, sand the edges of the glass to a feather edge then apply a final coat of resin to fill the weave and seal any exposed fibers.
A boatbuilding tip for when fairing glass surfaces with epoxy fairing, the fairing should be no thicker than needed to fill any hollows and with minimal thickness over any humps.
Sand it smooth enough to make the glass fibers disappear into the surface once it has been painted.

129 page, step by step instructions for building Eager Eve using modern plywood building techniques and materials
Yours to download (pdf) for
only $10

Filleting
Take care and time to make your epoxy fillets constant in radius and shape.
A fillet that sags is not pretty and is also weaker than one with a smooth curve that feathers out at the edges.
It is easier to sand out imperfections on a low-density fillet after it has cured than a high-density one.
Fillers such as cabosil or wood flour cure very hard, and are hard to sand.
However, a low-density fillet will not be as strong, so must be larger for equal strength.
It is also important to get the consistency of the epoxy right, too wet a mix and it will sag, on the other hand too dry and it will drag when you run your filleting tool over it.
You can rework an ugly looking high density fillet by adding an easily sanded low-density filler over it to hide it.
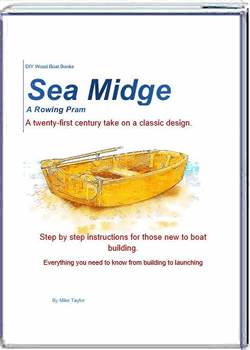
92 page, step by step instructions for building the Sea Midge, pram dinghy, using modern plywood building techniques and materials.
Yours to download (pdf) for
only $10
Sanding Between Coats
Just as you sand your wood surfaces before applying the first coat of epoxy, paint or varnish, you should also sand between each coat of finish.
The first coat will often result in surface fibers of the wood standing up.
Do not ignore this and paint over it.
A light sanding now to smooth the texture before applying the next coat will save a lot of extra sanding later.
Make sure to get rid of all dust using a tack rag or a vacuum.
Any dust that gets into the coating as it is applied will need a lot of sanding to smooth it before the next coat.
Sand lightly between coats if more time has passed than the over-coating time recommended by the manufacturer.
For epoxy this is normally 12 hours, for paint it varies.
It is also worthwhile to do a chemical wipe with acetone or mineral spirits to remove any surface contamination that may have come from skin contact or other sources of contamination.
A diesel generator running nearby can ruin your paint job due to oils in the exhaust gasses raining down on everything downwind of it.
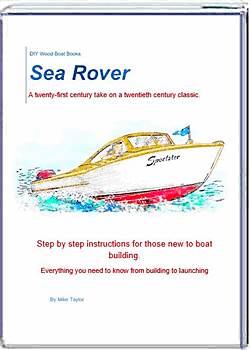
133 page, step by step instructions for building the Sea Rover using modern plywood building techniques and materials.
$10
Boat Building Tip for Saving on Timber
Buying wood that is planed all round, in the sizes that you need them is convenient but expensive.
It can work out a lot cheaper to buy your timber in wider planks then cut them down to size yourself.
That is, if you happen to own a table saw.
If your project is a small one, the cost of buying a table saw might outstrip any savings on lumber.
But if you do use one, fit a carbide-tipped blade with 40-50 teeth, this will rip the wood quickly and leave surfaces that need minimal sanding.
For large boat projects it is worthwhile buying a bench belt sander with 4 "wide belt.
This will speed up the sanding of framing and smaller items to a nice finish before fitting them into the boat
It will also allow you to fine-tune details such as pieces that need to meet neatly at intersections.
Attention to these smaller details is a boatbuilding tip that will make a big difference to the finished appearance of your boat.
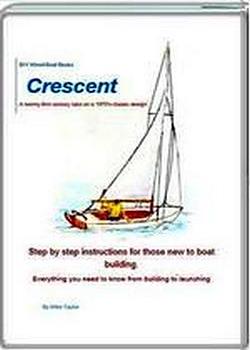
160 page, step by step instructions for building Crescent using modern plywood building techniques and materials.
Yours to download (pdf) for
only $10
Boatbuilding Tip Quotes
Des Sleightholme, boatbuilding tips
• To be successful, a self-draining cockpit should be at least eight inches above water level. The minimum leg room is held to be 15 inches.
To be successfully self-draining, a cockpit should be at least eight inches above water level, yet in must not be so shallow that it is virtually a box for the feet. ... The drains to empty it must be of at least 1 1/4-in. pipe.
• It must be mentioned that built-in buoyancy should never be more than a last resort. First comes design, and a hull that just cannot be swamped in a knockdown.
Norman L Skene, boatbuilding tips
• 'Science is first in the requisites for consistent success, but it must be blended with natural genius, imagination and much practical action'.
Henry Ford, boatbuilding tips
• Simplicate, and add more lightness.
• The first requisite of any practical boat is safety, the second comfort, and the third speed. Edson B Schock
John G Hanna, boatbuilding tips
• Other things being equal, the faster boat is preferable. The hell of it is, other things are never equal.
Cinch up your belt, roll up your sleeves, and go ahead and build it, regardless of hell, hurricanes, and high prices. It'll always be worth the cost, as it always was.

88 page, step by step instructions for building Pod using modern plywood building techniques and materials
Yours to download (pdf) for
only $10
William Atkin, boatbuilding tips
• Unless a boat, however small and simple, is built in a shipshape manner, it is better not built at all.
• 'It is only when the topsides stand high above the water that your straight-sectioned boat looks' boxy.'
• (About a 16 ', 8mph power boat) The deadrise is approximately constant throughout the bottom sections, a feature that, assures (all values being equal) an easy and comfortable boat in rough water.
John Teale, boatbuilding tips
• The center of buoyancy should be just aft of half way between bows and stern.
• Flat-bottomed vessels need slightly more centerboard area; round bottomed ones can get away with slightly less.
HV Sucher, boatbuilding tips
• The beam of a flat-bottomed boat should be no more than half the length; if it is to be rowed or sailed, the length should be two and a half to three times the beam.
Phil Bolger, boatbuilding tips
• In wall-sided boats, making the curvature of the sides equal to the curvature of the bottom ensures that the water pressures at each surface are equal, and reduces eddying and wake, and therefore drag.
• Expense: Never use expensive materials to build a boat designed to be cheap; also, it is bad business to design a cheap looking boat that will be expensive to build
T Harrison Butler, boatbuilding tips
• Do not concentrate ballast amidships in a ballasted boat, or the craft will move unpleasantly, but do not spread it too far, as that will turn it into a diver. A happy medium is likely to be to distribute it over about the middle third of the distance from stem to stern.
• In small and medium-sized cruising vessels, make the least freeboard about a tenth of the LWL.
• Suitable beam in a round-bottomed cruising boat should be found from the formula square root beam = cube root LWL.
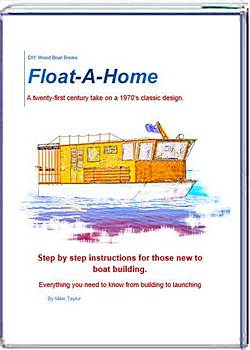
94 page, step by step instructions for building the "Float a Home" shanty boat using modern plywood building techniques and materials.
Yours to download for
only $10
Pete Culler, boatbuilding tips
• Wineglass sections throughout the hull will give slack diagonals in a chunky boat - and that's good!
John F Sutton, boatbuilding tips
• To minimize wave-making, (i) the length on the waterline should be as great as possible; (ii) there should be no parallel body; (iii) the curve of areas of cross section at the waterline should increase smoothly to a peak just aft of amidships and then decrease similarly smoothly, tailing off at both ends; (iv) there should be no abrupt changes in the shape of the of the cross sections, although plaining vessels are an exception to this; (v) in sailing craft, conditions (i) to (iv) should be met also at heeling angles of up to 15 to 20 degrees.
Howard Irving Chappelle, boatbuilding tips
• A straight, nearly upright stem with a good depth of forefoot produces a dry bow.
• To be dry, keep the weight away from the ends of the craft. Also, to be dry a bow should pick up buoyancy smoothly as it submerges and only needs a moderate flare - in fact a straight-sided Vee-section will do. There is no advantage to a hollow entrance and a great width at the sheerline. Carrying flare aft can contribute significantly to dryness, however. Hollow should not be considered in anything but a relatively long craft with a length of no less than four times the beam. In craft with a large square stern, a raked transom with provide lift when hit by a wave.
Most sea kindly boats have between three to five beams to their length, and a draft of one quarter to one half of the beam. they also had keels that were significantly deeper at the stern than at the bows to prevent any tendency to broach in a following sea.
• Balance is important - for example a narrow and deep hull combined with a wide and shallow stern is undesirable - but in motorized fishing vessels, at least, this balance of the hull need not be precise and does not on its own justify a canoe stern .
• Full-ended boats may seem dry, but this is only because they can not be made to move quickly in a seaway.
James Wharram, boatbuilding tips
• Length should be at least 6 times beam. 10 times beam is better ... at about 14 times beam the energy saved in smaller immersed cross section begins to be exceeded by increasing surface friction
William Garden, boatbuilding tips
• A 23 'catboat is a one-portlight-per-side size; two would be an affectation.
• Double the fiberglass overlay on chines centerline and sheer to reinforce these stress points. Over-zealous sanding on the easy-to-do corners is a major cause of glass overlay cracks.
• In selecting a rowboat, remember that a 265-pound Whitehall is too much for pleasure rowing ... About 100 pounds is the limit for enjoyable rowing.
• The first rule of economy is deletion, and the second rule is substitution.
RD Culler, boatbuilding tips
• Nail where you can, screw where you must, and bolt where you have to.
• A boat without flare is like a ship painter's pontoon, and about as handy underway.
• The keel, stem and stern post of a lapstrake boat should be twice the thickness of the planking, plus the thickness of the stem bolts, plus 1/8 inch.
• Never glue the strakes of a lapstrake boat.
FS Kinney, boatbuilding tips
•. Creating the perfect line means using the eraser again, and again, and again.
• Side decks should be a minimum of 15 inches in width. With anything less it may be wiser to put the deckhouse right out to the side of the hull.
John Welsford, boatbuilding tips
• You can complete your project on time, or or under budget. Never both.
• My experience is that the initial drawings should be hand drawn, but then I am a technophobe when it comes to the electronic drawing board, and chewing on a mouse is not nearly as satisfying as a pencil.
• A small boat of traditional flavor is in reality a caricature, to get the features that say 'trad' and give the boat its flavor there needs to be subtle exaggeration and this can be hard to achieve without either over or under doing it. The designer has to pick out those characteristics in the 'parent' that make it memorable or individualistic and translate those into a form that says to the viewer, 'look at me, I'm going to be like my daddy when I grow up! '
John Illingworth, boatbuilding tips
• A 7-in coaming for even small boats is not too high.
C William Lapworth, boatbuilding tips
• Regardless of the volume of the (self-bailing) cockpit, the drains should be large enough to drain it completely in three minutes after it is filled to the coaming. To prevent flooding of the cabin the cockpit should be filled, the sills of the companionways should be no lower than the lowest point of the coaming.
Previous posts
See What Others Have Posted
Sanding Epoxy
I've recently had a spot of trouble with epoxy coating due to Amine Blush which is produced by almost all epoxy resins.
At least I expect that's the …
Composite nails are fantastic
I just strip planked a 16' cedar canoe with RAPTOR composite nails.
The nails did not have to be removed; they sanded smooth and help the strips better …


You might like these
Boat Books for Wooden Boat Builders
Boat Books a series of boat books based on some of the 1960's, classic, Free Boat Plans that were published in magazines such as "Popular Mechanics", "Popular Science" and the "Boat Builder Handbook".
Ring Nails for Marine Fastening.
Ring Nails sometimes call Gripfast or ring shank, silicon bronze boat nails are renowned for their holding power. but how to get them out?
The Ashcroft Method of Planking a Wooden Boat
The Ashcroft method of building small wooden boats, an early from of cold moulding using thin layers of wood with the layers all running same direction.
Knotty wood, problems with boat building timber.
Knotty wood, how to avoid structural problems with knots in lumber when using softwood timber for fitting out and boat joinery
Build a Boat, tips for the DIY Wooden Boat Builder.
How to Build a Boat, Wooden Boat Building methods for the DIY, backyard, self-builders explained, carvel, lapstrake and plywood
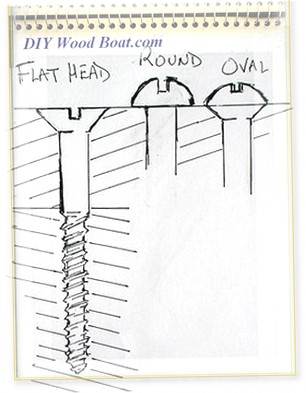
Wood Screws for Boat Building and Repair.
Wood Screws are the most widely used and versatile fasteners used on wooden boats. Which type to use and how to use them
Wood, Environmentally Friendly Boat Building Lumber.
Make sure that the Wood that you buy and use is sustainably grown and harvested.
Timber, Lumber for Boat Building.
A brief description of the most common Timber used for building Wooden Boats how to choose wood for your project boat
Timber Properties
A brief guide to timber properties and wood, characteristics such as strength, stiffness and elasticity for choosing lumber for wooden boat building and restoration.
Rivets and Copper Rove Wood Boat Fastenings.
How to use Copper Rivets and Roves construction guide to fasteners on your wooden boat.


Recent Articles
-
Reader's Boat Photos
Aug 23, 25 09:08 AM
 Gallery of Readers uploaded Photos
 -
The Sliding Bevel
Jun 19, 25 02:52 AM
 By Robin Gates
The Sliding Bevel: A Boatbuilder’s Tool for Precision
For angles other than the perpendicular of the try-square and 45 degrees of a mitre-square, the essential measuring tool is a slidin…
-
Winter Bilge Issues
Jun 18, 25 07:34 AM
 By Adrian Morgan
Winter Bilge Issues: Can a Classic Boat Spend Too Long Ashore?
Beware the score of too long ashore, Adrian Morgan warns us…
Continue reading "Winter Bilge Issues"
You might like these
Wooden Boat Restoration, Repair and Maintainence.
Wooden boat restoration, how to fix up an old wooden boat, one of the cheapest ways to get afloat and have a boat to be proud of.
Epoxy Resin for DIY Wooden Boat Building.
A guide to the epoxy resins and sustainable enrtopy resins to use when building wooden boats with marine plywood.
Wood Rot Repair and Treatment
Wood rot in wooden boats, how to treat, repair and replace rotten timbers in a wooden boat
Vintage wood Boat Bottom Replacement
The ultimate bottom repair for a vintage wood boat, when re-caulking the planking on your classic antique boat
Surveying a wood boat
The problem areas to look out for when surveying an old wooden boat.
Initial Boat Survey Checklist
The initial survey questions to ask when looking at a Wooden Boat with a view to restoring or renovating
Stem and Stern Post Rebuilding
Repairs to the Stem of a wooden boat can be undertaken by the amateur with a little care and attention.
Planking a Carvel Boat
How to replace damaged or unsound carvel Planking, a guide for any reasonably competent amateur.
Iron Keel Rust Removal
Keel rust, how to remove rust from an iron keel and treat it prior to repainting your wooden boat restoration project.
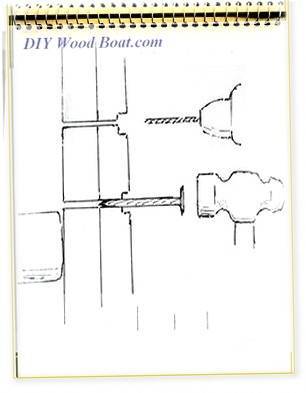
Wedge Seam Construction
Wedge Seam Construction method for wooden boat building and glued wedging or ‘splining’ as a restoration technique for restoring old carvel planking seams.


This work is licensed under a Creative Commons Attribution-ShareAlike 2.0 UK: England & Wales License.
I am perfectly aware that the majority of Wooden Boat aficionados are sensible folk.
However, I need to point out that I am an amateur wooden boat enthusiast simply writing in order to try to help other amateur wooden boat enthusiasts.
And while I take every care to ensure that the information in DIY Wood Boat.com is correct, anyone acting on the information on this website does so at their own risk.