- Home
- Your Boats
- Planking
Replacing Carvel Planking.
The replacement of damaged or unsound Carvel Planking is within the capabilities of any reasonably competent amateur.
Before even considering replacement, make sure that the backbone, keel, stem, frames, etc are sound.
Garboard strakes tend to be the strakes most in need of replacement.
Fortunately, these are usually the strakes which have least curvature
and
hollow at the rabbet, so should be the simplest to replace.
However, even those on the turn of the bilge and those with Reverse
turn, such
as below the transom can be replaced with a little patience and
attention to
detail.
Don’t even consider sheathing a carvel hull, it will only make matters worse.
Making a Pattern.

Before removing the offending
strake think about how you are going to get a pattern for the new plank.
When I began work on Mignonne’s garboards I had the bright idea of removing the strake whole and using that as a template.
However, even after freeing it from all the fastenings and caulking, the garboard was still held in place with all the paint etc, which had accumulated over the years.
I tried pushing from the inside but eventually had to wallop it with
the
mallet, as a result it shattered at the rotten area so, no good as a
template.
To get my pattern I then had to glue together (with a hot glue gun) a
long
strip of thin plywood which would fit in the gap flat on all the frames.
The gaps between it and the upper and lower strakes I filled with small
pieces
of ply using the hot glue gun.
When I started on the second garboard I drew my pattern before removing the plank.
Using a long strip of wallpaper taped to the hull I was able to trace the line of the seams.
This pattern was then transferred to stiff card and checked against the frames once the plank was removed.
The video below shows another method for taking off plank dimensions as well as showing how the new plank is fitted.
Removing the Old Planking.
Getting the old strake out without damaging the frames or adjacent plank edges can be a bit of a problem.
First job is to rake out all the old caulking.
Then, I found the simplest way was to use a hole-saw or plug cutter to cut around each fastening.
This left the fastenings in a small plug of timber which was easy to remove once the old strake was out.
You have of course, to be very careful not to cut into the underlying frame.
You may find, as I did that the strake will still be held fast by all the paint and such like, which has seeped between the frame and plank over the years.
I had to use a mallet on the inside of both of Mignonne’s garboards to free them.
affiliate linksCutting the New.
Once you have your pattern/template you can work out what size of lumber you will need to buy.
The greater the curve in the original strake, the wider will be the lumber needed to cut the new one from.
While you can bend a strake laterally by edge-setting while building it isn’t so easy to do when replacing an old one.
Making your new one in two pieces then joining with a butt or scarf joint will help save on the width you require.
I positioned the scarphs on Mignonne’s new strakes to coincide with the through bolts for the floors.
It is not a good idea to position butt joints on steam bent frames as the fastening could cause the plank to split.
Butt blocks should be positioned in areas where there is as little twist to the strake as possible.
Once you have traced out your pattern/template on the new timber, fair up the lines with a stiff bendy batten, preferably one longer than your plank.
Don’t forget to mark which side is going to be the inside and which the outside and which end is towards the bow.
Once cut it is advisable to try your strake for fit before fairing up with a plane.
Your new strake may require the edges to be beveled to allow for caulking, depending on the original construction you may only need to do this on the lower edge.
Remove the sharpness from the inside edges to prevent them from digging into adjacent wood when installing.
affiliate linksScrubbing.
Before fastening your new strake it will more than likely need to have the inside surface shaped so that it fits the shape of the frames.
Where the frame is convex the plank will need to be concave and vice versa or they will split when fastened.
You may have to allow some extra thickness for this if the frames are tightly radiused, as too much hollowing will reduce the strake thickness.
It might be possible to flatten the frame rather than scrub out the strake, but beware of reducing the frame strength.
Bending.
If the strake that needs replacing has a lot of bend to it you may unfortunately, have to resort to steam bending.
Taking the hot wood straight from the box and attempting to fit it quickly before it cools is probably best left to the professionals.
For the amateur, it is less stressful to pre-bend the strake to the approximate curve before trying to fasten it in place.
affiliate linksFastening and Fairing.
Before fastening the new strake in place paint the inside especially with a preservative, my own favorite is good old creosote.
And it’s a good idea to put some linseed oil on the edges as a lubricant but only if you intend using an oil based caulking compound, the same goes for the use of creosote.
Screws are best type of fastener for the ends where they meet the stem or stern rabbet.
It’s best to begin fastening the areas where most bending needs to take place so you have plenty of leverage at the free end.
If working alone, the free end will need supporting, a rope strop with a slip knot or rolling hitch will allow for adjustment.
Red lead putty may be used instead of plugs to cover the heads of the fasteners.
However, the better option is to use wooden plugs cut from the same material as the strake.
The plugs should be tapped home with the grain running in the same direction as the strake's grain.
Plugs should be a firm fit but not too tight, nor should they be compressed by hammering in.
A ‘flush-cut’ saw is ideal for trimming plugs.
To finish, any uneven areas can be planed off, then sanded with an orbital sander on slow speed.
Replacing below the water line planks may seem like a daunting task for the amateur.
The strakes I replaces on Mignonne were the first I had ever done on my own, yet now she is back in the water and the wood has 'taken up' she is water tight and sound.
So, if I can do it, so can you, it just takes time and care.
But before she can go back in the water she will need caulking.
affiliate links
Previous posts
See What Others Have Posted
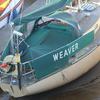
WEAVERS ROTTEN PLANKS
Removed paint where rot was most noticeable, as you can see from the photos a number of areas.
One area has gone right through to the ribs.
I am …
removing bad part of a plank on a clinker built boat
I have removed all the copper rivets and can get some movement from the plank but I cant figure out how to cut the scarf joint in the 'good' wood part …
21 foot Shetland model called Daisy
The boat was built in 1965, heavy boards up to waterline to enable it to go on skerries and kill seals.
I need to replace a board would like some advice …


You might like these
Wooden Boat Restoration, Repair and Maintainence.
Wooden boat restoration, how to fix up an old wooden boat, one of the cheapest ways to get afloat and have a boat to be proud of.
Epoxy Resin for DIY Wooden Boat Building.
A guide to the epoxy resins and sustainable enrtopy resins to use when building wooden boats with marine plywood.
Wood Rot Repair and Treatment
Wood rot in wooden boats, how to treat, repair and replace rotten timbers in a wooden boat
Vintage wood Boat Bottom Replacement
The ultimate bottom repair for a vintage wood boat, when re-caulking the planking on your classic antique boat
Surveying a wood boat
The problem areas to look out for when surveying an old wooden boat.
Initial Boat Survey Checklist
The initial survey questions to ask when looking at a Wooden Boat with a view to restoring or renovating
Stem and Stern Post Rebuilding
Repairs to the Stem of a wooden boat can be undertaken by the amateur with a little care and attention.
Iron Keel Rust Removal
Keel rust, how to remove rust from an iron keel and treat it prior to repainting your wooden boat restoration project.
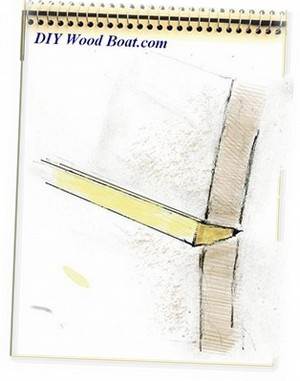
Wedge Seam Construction
Wedge Seam Construction method for wooden boat building and glued wedging or ‘splining’ as a restoration technique for restoring old carvel planking seams.
Winterizing Your Wooden Boat
Don't allow Winterizing Your Wooden Boat to become a chore, make a list, spread the jobs and visit her regularly, a wooden boat is not just for summer.


Recent Articles
-
Reader's Boat Photos
Aug 23, 25 09:08 AM
 Gallery of Readers uploaded Photos
 -
The Sliding Bevel
Jun 19, 25 02:52 AM
 By Robin Gates
The Sliding Bevel: A Boatbuilder’s Tool for Precision
For angles other than the perpendicular of the try-square and 45 degrees of a mitre-square, the essential measuring tool is a slidin…
-
Winter Bilge Issues
Jun 18, 25 07:34 AM
 By Adrian Morgan
Winter Bilge Issues: Can a Classic Boat Spend Too Long Ashore?
Beware the score of too long ashore, Adrian Morgan warns us…
Continue reading "Winter Bilge Issues"


This work is licensed under a Creative Commons Attribution-ShareAlike 2.0 UK: England & Wales License.
I am perfectly aware that the majority of Wooden Boat aficionados are sensible folk.
However, I need to point out that I am an amateur wooden boat enthusiast simply writing in order to try to help other amateur wooden boat enthusiasts.
And while I take every care to ensure that the information in DIY Wood Boat.com is correct, anyone acting on the information on this website does so at their own risk.