- Home
- Your Boats
- Spiling
Spiling
Spilings; In carpentry
and shipbuilding, the dimension taken from a straight line, a moulds
edge or rule staff, to any given side or curve of a plank’s edge. (Smyth, A. W. (2005). The
Sailor's Lexicon (Rev. ed. of Sailor's word-book, 1996 ed.). New York:
Hearst Books, p, 643)
One of the problems associated with restoring or building a boat is that almost all components have complicated curved shapes.
But it is those curved shapes and lines that make a boat such a thing of beauty.
Spiling Methods
A spiling batten traditionally is used to record
the shape of the
bottom edge of each new plank at the moulds.
The batten is then used to transfer this shape to the planking stock.
When it comes to replacing an old plank or panel the most obvious way
is to copy it by simply tracing around the old one.
However, getting an old plank out without it breaking or distorting is much easier said than done.
Many boat builders and restorers have a favourite way for tracing out the shape of a plank or bulkhead.
The most common rely on using an intermediate, partial ‘pattern board’ or ‘spiling batten’ on which the distances to salient points on the object to be copied are marked in such a way that they can later be transferred to either a full sized pattern or the planking stock.
These points can then be joined by a continuous line using a fairing batten.
Other methods include tracing and building a skeleton mock-up.
Also see 'Drawing Bow'.The Tick or Joggle Stick
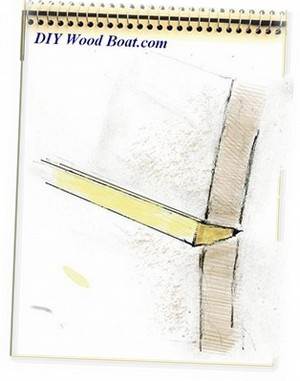
 Tick/Joggle Stick
This is probably the simplest and most accurate method for copying an
oddly shaped plank or panel.
The ‘stick’ can be any old scrap of stiff timber cut to a suitable
length, pointed at one end and notched asymmetrically.
You will also need a ‘spiling batten’, this can be a scrap piece of thin plywood.
For copying the shape of a plank the ‘spiling batten’ wants to be the full length (several pieces can be butt jointed with glue or staples) but narrower than the original plank.
The ‘spiling batten’ needs to be tacked or
clamped to the ribs in the
gap left when the old plank has been removed.
There should be sufficient clearance to ensure that the batten is not distorted by pressing against the planks above and below.
 'Spiling Batten' with Jiggle Stick
Giving the board a coat of white undercoat will make it easier to see
all position marks.
Before starting to use the tick stick it is worthwhile marking the
positions of all relevant underlying structures such as ribs, fastening
positions etc.
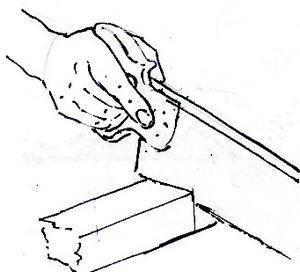
Now you have that set up place the ‘stick’ flat on the ‘spiling
batten’, place its point at a position on the hull/plank that
you want to record and then trace the outline of the stick onto the
‘pattern board’ with your pencil.
Repeat this for as many points as will be needed to recreate a complete
profile of the plank shape.
When you feel that you have sufficient data on the batten take it down and lay it and clamp it firmly to the new planking stock or panel.
Now place the tick/joggle stick carefully within those pencilled outlines on the batten and then mark the position of the point onto the new stock.
 Tick Joggle Batten on the New Plank
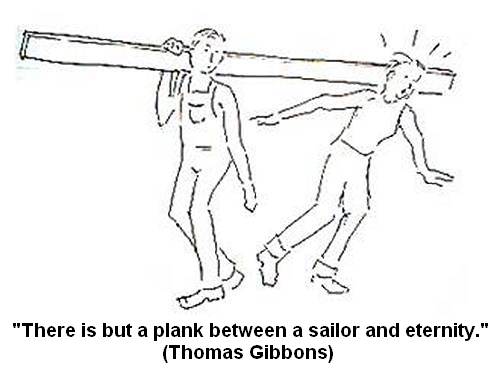
"Every man's work, whether it be literature, or music or pictures or architecture or anything else, is always a portrait of himself."
(Samuel Butler, 1612-1680)
Because of the asymmetrical notches on the stick it will only fit
within the pencilled outline the same way up as it was when the outline
was drawn.
Then all the position points can be joined up using a faring batten and or straight edge.
The faring batten is just a long thin strip with straight edges that will bend evenly, straight grained wood is ideal for this.
Some builders/restorers use a similar technique but instead of that notched stick they will use a pair of dividers or compasses or even a small block to mark the positions.
If you also transfer all the positions of ribs etc these will help when
it comes to drilling for fasteners and as datum marks for positioning
the plank.
It is almost inevitable that the plank will need some trimming, it is imperative that these datum marks are used to offer up the plank in exactly the same position each time.
Certainly these methods will work but extra care must be taken to ensure that the distance between the divider points remains the same for every mark and the angle at which it is held must also be the same.
Truss Templates
Another way to spile is to make a truss
like template.
This can be done for almost any shape.
The template is made up using scraps of light timber or plywood glued
together in situ with the hot glue gun or stapled.
For a plank, using long flexible battens for the upper and lower edges
will provide an almost perfect pattern.
Do remember to mark all reference positions such as ribs etc.
A hot glue gun is convenient way to make ‘trusses’ because the glue
sets quickly and is easily controlled.
 Spiling Truss Template
Backing Out
Having cut a plank so that it fits in the
space in between the adjacent
ones is not the end of the story.
The back of most planks will need shaping so as to sit snugly and
evenly on to the supporting ribs.
If the plank doesn’t sit tight and evenly against the curve of the
frame or rib undue pressure on the ‘hard spots’ could cause the frame
to fracture at that point.
In most cases the back of the plank will need to be cupped, made
concave.
When cutting a new plank that is going to require a lot of cupping it
is best to begin with timber that is a fraction thicker that the
original planking.
A piece of stiff card can be used to trace the shape of each rib then
cut out to make a rough guide with which to check the cupping.
The amount of shaping will vary for each frame along the plank length,
so this needs to be repeated for each frame.
Then finally fair the back of the plank between the frame locations.
Even if steaming were an option it is unlikely that a plank could be bent across its width without it splitting along the grain.
Edge setting
'Edge setting’ is a way in which minor
tweaking of a plank shape can be
accomplished by clamping it hard down onto the plank below.
However, this is something that can only be done when building and the amount of ‘tweaking’ is minimal.
Polythene Sheet
Occasionally you may need to record the positions of a more complex set
of underlying structures, such as the beams under a deck panel.
One easy method is to use a sheet of reasonably stiff, clear, polythene
sheeting.
Not only can you see through it when positioning but you can easily cut
it and mark out the positions of underlying beams with a marker pen.
The only problem is that this kind of sheeting is easily stretched and distorted, it is not ideal for long thin traces such as planks, it is better to use a proper stiff spiling batten.
Previous posts
See What Others Have Posted
Why Lofting?
I am new to boat building and am reading "The Wooden Boat Manual" (Robert Steward).
I can't understand why the curves of the sections on the full-size …


You might like these
Using a Hand Saw
Using a hand saw, how to cut straight and square by hand with a wood saw.
Tool Care
Tool care, how to keep your boat tools rust free, shiny and sharp, especially those you keep onboard.
Sharpening and Honing
A guide to Sharpening and Honing woodworking tools, sharpening stones and strops for a keen edge.

Recent Articles
-
Reader's Boat Photos
Aug 23, 25 09:08 AM
 Gallery of Readers uploaded Photos
 -
The Sliding Bevel
Jun 19, 25 02:52 AM
 By Robin Gates
The Sliding Bevel: A Boatbuilder’s Tool for Precision
For angles other than the perpendicular of the try-square and 45 degrees of a mitre-square, the essential measuring tool is a slidin…
-
Winter Bilge Issues
Jun 18, 25 07:34 AM
 By Adrian Morgan
Winter Bilge Issues: Can a Classic Boat Spend Too Long Ashore?
Beware the score of too long ashore, Adrian Morgan warns us…
Continue reading "Winter Bilge Issues"
You might like these
Wooden Boat Restoration, Repair and Maintainence.
Wooden boat restoration, how to fix up an old wooden boat, one of the cheapest ways to get afloat and have a boat to be proud of.
Epoxy Resin for DIY Wooden Boat Building.
A guide to the epoxy resins and sustainable enrtopy resins to use when building wooden boats with marine plywood.
Wood Rot Repair and Treatment
Wood rot in wooden boats, how to treat, repair and replace rotten timbers in a wooden boat
Vintage wood Boat Bottom Replacement
The ultimate bottom repair for a vintage wood boat, when re-caulking the planking on your classic antique boat
Surveying a wood boat
The problem areas to look out for when surveying an old wooden boat.
Initial Boat Survey Checklist
The initial survey questions to ask when looking at a Wooden Boat with a view to restoring or renovating
Stem and Stern Post Rebuilding
Repairs to the Stem of a wooden boat can be undertaken by the amateur with a little care and attention.
Planking a Carvel Boat
How to replace damaged or unsound carvel Planking, a guide for any reasonably competent amateur.
Iron Keel Rust Removal
Keel rust, how to remove rust from an iron keel and treat it prior to repainting your wooden boat restoration project.
Wedge Seam Construction
Wedge Seam Construction method for wooden boat building and glued wedging or ‘splining’ as a restoration technique for restoring old carvel planking seams.


This work is licensed under a Creative Commons Attribution-ShareAlike 2.0 UK: England & Wales License.
I am perfectly aware that the majority of Wooden Boat aficionados are sensible folk.
However, I need to point out that I am an amateur wooden boat enthusiast simply writing in order to try to help other amateur wooden boat enthusiasts.
And while I take every care to ensure that the information in DIY Wood Boat.com is correct, anyone acting on the information on this website does so at their own risk.