- Home
- Your Boats
- Finishing Touches
Finishing Touches
A few simple finishing touches will transform the appearance of your wooden boat giving her that classic traditional feel.
The appearance of the majority of the wood work on your boat is going to be going to be determined by its function.
However, the expression that 'form follows function' overlooks how a modicum of decorative detail can transform the utilitarian into a thing of beauty.
The ultimate sign of a serious boat builder is having an individual style.
This does not need to be anything flamboyant such as gilding
in fact often the most effective way is to have a couple of favorite finishing touches.
My own particular favorite finishing touch is the ' Bird's Beak '.
Bird's Beak
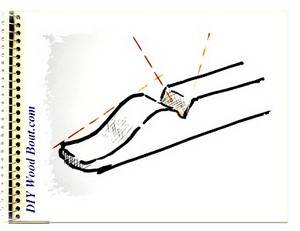 Bird's Beak
This used to be a fairly common method for finishing a boat's woodwork.
But that was back in the days when craftsmen had the time and inclination to give their work that touch of quality.
So this is a particularly pleasing bit of finishing touch detailing to use on a classic boat.
If you really want to stamp your individuality on your boat you can develop you're own variation, then use it regularly.
The Bird's Beak 'can be used on Handrails, Toe Rails, Grab Rails, as well as sliding hatch tracks, knees, etc.etc.
It only takes a few moments to cut a long bevel and the ‘V’ with a saw.
Then round off the corners with a chisel or a rasp.
The concave bevel can be shaped with a half round rasp or with a Radius Spokeshave.
Finishing Touch Beading Tool
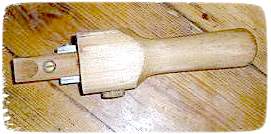 Beading Tool
This simple little tool is superb for putting fine finishing detail on by hand.
It can be used on either the push or pull direction.
Different shaped blades can be bought, however it is relatively easy to make your own.
Just take care that the blade isn't allowed to follow the grain rather than being controlled by the stop.
Cutting Grooves
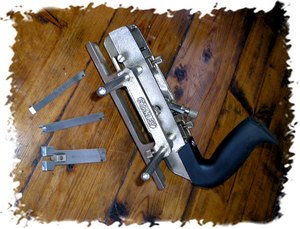 Multi Plane
One of my favorite tools is my ‘Multi Plane’.
This is a plane which is designed to cut grooves.
It has a variety of blades for cutting flutes, beads and moldings.
Mostly I use it to cut decorative beading.
I don’t like to over do the decoration just add enough finishing touches to take the plainness away.
Of course, you can do all that and more with a Router, I just happen to enjoy the satisfying, quiet, swish of sharp plane cutting through the wood.
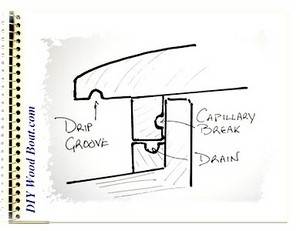 Drip Grooves and Capillary Breaks
I also use the multi plane to cut Drip Grooves and Capillary Breaks.
These aren’t decorative, they are very important functional design elements.
For the vast majority of us wooden boat owners crashing into an iceberg is not up there on our list of worries.
Our biggest worry is how to prevent wood rot.
This is a problem which, is caused mainly by the insidious creep of moisture into cracks and crevices where it gets trapped.
Water, because of its surface tension and by virtue of capillary action will run along the underneath of overhangs and creep upwards between close fitting surfaces.
And it is especially fond of shiny surfaces, like varnished or gloss painted wood.
There are numerous products on the market which promise to prevent rot and seal cracks but the best form of prevention is cure.
And the best way to stop water creep is to create breaks to its flow.
On overhanging lips, such as around cabin tops or hatch tops a simple drip groove on the underneath will be enough to overcome the surface tension.
And where there are close fitting surfaces, such as inside the rim of a hatch a simple capillary break will stop any tendency for it to osmose upwards.
While these measures should be part of the general practice, for a professional boat builder they are the sort of finishing touches details that the amateur often overlooks, at his peril.
affiliate links

