- Home
- Your Boats
- Boat Varnish
Boat Varnish to Beautify Your Brightwork.
Boat Varnish, is for many owners is the favorite way to show off the
natural
beauty of the wood and their boat.
On wooden boats I believe it is best to stick to the traditional type of oil based boat varnish.
Or the natural sheen and ease of maintenance of an oiled finish.
However, maintaining that glossy varnish finish doesn't have to be a battle.
Maintaining your Boat Varnish.
To keep boat varnish looking smart requires regular maintenance.
UV rays (sunlight), is the major cause of damage to a varnished finish.
All good quality marine varnishes contain UV blockers.
Unfortunately these do eventually break down allowing the UV light to penetrate to the base layers.
And when it does the base coat will begin to deteriorate and start to separate from the wood leaving you with those horrible opaque blisters.
Once the varnish has reached that stage the only option is to strip it all off and start again.
To avoid this happening you need to renew the UV protection by regularly sanding back and replacing the top coat.
How often this needs doing will depend on the amount of sun it is exposed to, generally once in the spring then again at the end of the season should be sufficient.Not only will this top up the UV protection but it will fill up any scratches or cracks and your varnish will get better looking every year.
And filling those scratches will prevent moisture from getting underneath the base coat which will also damage the varnish to wood bond.
Here is a quick rough guide to
when your varnish needs freshen up.
Give it a good wash, then when it is still wet the water should form
beads on the surface.
If the water forms sheets or flattish streaks it's time to re-do that
top coat.
Surface Preparation.
Even where you are merely touching up sound boat varnish, the surface must be sanded to provide a key so the new varnish will adhere well.
Varnish should always be sanded with a fine grit, 150 or less, a course paper will leave scratches which will be impossible to hide.
For boat varnish work, always sand along the direction of the grain of the wood and not across it, so it really needs to be done by hand.
Where old varnish is lifting, blistered or has flaked it is better to take it all off and start again than to try to patch it up.
Start off with a long handled scraper, this is the type of job they are designed for.
If there is a lot of thick varnish to be removed you could resort to a hot air gun and a hook scraper or if you are feeling brave a blow torch.
I have found that chemical strippers are messy, hazardous to use and work out quite expensive, I'd rather take my chances with a blow torch.
Once you have got the old varnish off, or if you are starting from bare wood you then need to give the area a good sanding.
The smoother the surface of the bare wood the better will be the final finish.
Finish off with a cabinet scraper to get a really fine, smooth finish.
Take care if you are sanding down plywood, the last thing you want is to go through that top veneer.
Before beginning varnishing it is imperative that you clean off all traces of dust.
A vacuum cleaner is the most effective method for removing sanding dust.
Then finish off by wiping the surface with a 'tack rag', a lint free cloth damped with white spirit or denatured alcohol.
Where the wood has become discolored you can try using a chemical wood cleaner, but they are not something I have had any satisfactory results from.
I have found that wood cleaners merely bleach out the natural color of the wood without entirely removing the stain, but then perhaps I didn't read the instructions properly.
If you intend using masking tape use the blue plastic variety or the bright colored electrical tape, it can be left on for days and still peel off cleanly.
There may be occasions when you wish to remove unsightly wood stains from the surface before re-varnishing.
This is usually done with bleach solutions such as oxalic acid, just be aware that these are rather nasty chemicals.
Wood Stains.
I'd just like to point out that I'm
referring to the type of
stain which soaks right into the wood and dyes it.
There are a number of propriety wood applications which promise
enhanced UV protection but which are basically pigmented emulsions
which coat the wood, in my humble opinion a coat of paint would look
better.
But then I have never had a very satisfactory result from using
dyes.
They are not easy to use and the colors will alter as they dry and with
time and UV light.
However if you really feel you must use a stain, the wood must be completely bare with no varnish grease etc to prevent the dye soaking in.
And you should have completed all the surface preparation, sanding etc.
Try out the stain on a scrap piece of the same wood first to check how it is going to look.
These dyes soak into the wood, so once they are on you'll find them difficult to alter, you might be able to sand them back a certain amount.
Most dyes are spirit based so they can be diluted with a solvent or white spirit.
For best results apply liberally then wipe off the excess.
The stain must of course be completely dry before you begin varnishing.
affiliate linksVarnish Brushes.
A good quality, fine, natural bristle brush is a must if you want a good finish to your boat varnish.
New brushes usually need a good clean before use, to get rid of any shop dust and help prevent any bristle loss.
Clean and store boat varnish brushes by suspending them, with the bristles fully submerged, in raw linseed oil.
When you're ready to use them squeeze out the excess oil then rinse a couple of times in turpentine.
When you have finished varnishing, rinse off the excess boat varnish with turpentine before putting the brush back in the oil.
Suspending the brush in the oil rather than allowing it to rest on the bristles will keep the bristles straight.
affiliate linksPriming.
If you are varnishing outside wait for a dry day with little wind to blow dust around..
The reason for priming the
wood, whether for painting or
varnishing is to create a good bond between the wood and the
paint/varnish.
The traditional method when varnishing is to use thinned varnish for the initial coats.
Nowadays there are several clear primers available which purport to penetrate deeper into the wood and create a stronger bond.
However they aren't cheap and they create a hard coat which would be best avoided on any areas which flex.
And besides, the traditional, cheaper method seems to have worked fine on countless boats for many years.
So, to get that first sealer coat of boat varnish to penetrate deeply it needs to be thinned fifty/fifty with mineral spirits.
When brushing out the boat varnish, finish off by brushing with the grain.
Most of this first coat should soak into the wood leaving very little gloss on the surface.
This first coat will raise a 'nap' on the surface which will need to be sanded flat before any subsequent coats.
Use a fine grit sandpaper and remember to sand along the direction of the grain, then remove every trace of dust.
The second coat need only be thinned by about twenty-five percent.
Sand again and touch up any bare spots then sand again before going on to applying un-thinned coats of boat varnish.
Two coats is the minimum you will need.
Foe best results keep priming and sanding until the surface is sufficiently flat and smooth.
If you need to speed up the process you can use an accelerator or Japan drier.
Top Coats.
When you are satisfied with the base coats allow them at least 24 hours to dry.
Then after a final sanding and clean up you can begin coating with un-thinned boat varnish.
Pour enough varnish for one coat into a small container then reseal the can to keep the remaining varnish from being contaminated.
When brushing out the varnish, finish off by brushing with the grain.
Take care with this coat as any runs, sags, dust or loose bristles will stay to haunt you later.
The aim is to brush on and even film which is sufficient to cover but thin enough not to sag or run.
From now on you only want a very light sanding between coats using a 220 grit sand paper or less.
How many coats is up to you but the very minimum is three preferably five or more.Then, after all that careful work you need to maintain the finish and UV protection by giving it a coat or two every few month or so.
Roller and Tip.

I'm not keen on using rollers but if you have large flat areas to cover it might be the ideal solution for you.
Basically you will be following the procedures for brushing except that the roller will speed up the process of applying the boat varnish evenly.
The problem with the roller is that it tends to produce bubbles and leave a mottled finish so it needs to be 'tipped' with a brush or a painting pad.
The 'tipping', as the name suggests, involves very lightly dragging a dry brush or pad over the wet varnish.
Advocates say that it is a quicker method of applying boat varnish than brushing, yet to get a good finish requires two people, one rolling on the varnish while another follows closely with a bush to do the 'tipping'.
And all the awkward spots and edges still need to brushed.
Still, I suppose that if you have one or two helpers who are not very good at brushing it might be a good way to get everyone involved.
The person doing the 'tipping' should be the best at using a brush.
The person on the roller wets it out thoroughly, taking care not to spray drips.
The 'tipper' then follows closely behind lightly brushing it out.
It is important that the two work in consort, so that the tipper can keep up with the roller and always be working on wet areas.
affiliate linksOiled Finishes.
Wood oils
and tars are probably the oldest form of wood protection used by boat
builders.
They are particularly useful for working boats which spend a lot of time in wet conditions.
Unlike boat varnish they remain soft and move with the wood so they don't crack.
And because they penetrate and become part of the wood surface they don't have to rely on a surface bond so they won't peel.
They won't give the same high gloss as varnish, however, many folk
(including me) prefer this look as well as the lack of fuss
needed to
apply them.
Oils will however darken the wood and the traditional straight wood oils will soon become dull when exposed to the weather.
For the pleasure boater who likes the oiled finish there are several products which combine the benefits of a natural barrier with finishers which will retain the shine.
They are two part products, a penetrating oil to waterproof the wood then a top layer which bonds and provides a lasting sheen.
Oils can be easily applied by
brush, a cloth or with a
pad of synthetic wire wool.
Initial coats of Tung or
linseed oil should be thinned
and after each coat excess oil should be wiped off with a rag.
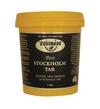
A sniff of Stockholm tar is supposed to be a sailor's cure for a hangover, so I'm told.
It is black though, so even when diluted with turpentine and linseed oil it will darken the wood considerably.
However it is an ideal
solution for waterproofing unseen
wood particularly hard worn areas such as anchor lockers, and worth
using for
the smell alone.
It certainly smells better than boat varnish.
Previous posts
See What Others Have Posted
Refinishing Wood.
On the 1990 Sea Ray Express the wood surrounding the stern top has black plastic deviders in it seperating where the wood ends and and otther piece begins. …
roller and tip
Brilliant article, and the comment on getting everyone involved is more serious than perhaps you meant it to be.
My lovely long suffering wife Christ …
Stockholm Tar supplies that will not break the bank
I promised a few days ago to start sharing a few of our tricks for basic survival as old wooden boat owners.
So, here goes for the first money saving …
Varnish and it's protection
I have just put 10 coats of varnish on after sanding off all the old varnish.
It's one of the biggest jobs I have done on the boat.
Does anybody …
Restoring and Refinishing Old Oak Hatch Doors
I have two doors that go to the booby hatch of our 1925 70ft tugboat.
The doors haven't been refinished in a very long time (we just purchased the …
New Herreshoff
Ready to finish my new boat made with Okume ply and was wondering what you recommend for an inside oil finish.
Know linseed and terps is old standby …
Make your own varnish
Here's the recipe - be sure to make a small batch and try it out - adjust to
your liking.
1 gallon
3 q, 1c boiled linseed oil
1 3/4 c turpentine …
