- Home
- Your Boats
- Applying Glass Cloth
Tips on applying Glass Cloth.
A few tips for applying Glass Cloth on wooden boats for anyone considering building or repairing a fiberglass sheathed boat for the first time.
Whether it is plywood such as stitch and glue or strip planking there are a few basic fundamentals to remember.
Supplies
Before you start applying glass cloth make sure you have enough to everything.
And not just the Epoxy and glass cloth but all those other bits and bobs such as spatulas, mixing cups, rollers etc needed for applying glass cloth.
Running out of epoxy in the middle of the job is a nuisance but running out of applicators or mixing cup can be even more frustrating.
As it is nigh on impossible to clean and reuse brushes or rollers, stock up with cheap disposable ones.
And that goes for latex gloves, you might not be allergic to epoxy when you start but prolonged exposure can become a problem.
affiliate linksSmoothing
Right, you've got every thing ready and lined up ready to go.
But before you start to lay the cloth , get all the faring and smoothing done.
Any holes (empty wire stitch holes), hollows, gaps and the like should be filled with thickened epoxy.
The surface of the wood is probably best 'smoothed' as you would do it if you were applying paint, so smooth and level but key the surface to aid penetration and adhesion.
Laying cloth
You will find it easier when applying glass cloth to do any adjustments trimming etc when the first coat is dry, though it can be done when it is wet.
For a small boat or canoe it is possible to cover the hull with one sheet of cloth, other wise joints will need to be made.
Joints can simply be butted, however this can be fiddly, overlapping joints are easier.
The weave of glass cloth is quite loose so it will mold easily to the shape of the hull.
Trim any hanging edges so they are not going to get in the way as you work around the piece.
Once you are happy with the cut of your cloth, you can apply the wetting out coat of epoxy.
This coat as well as wetting out, bonds the cloth to the surface.
The trick here is not to apply more resin than is necessary and only mix it in batches that you have the time to apply before it starts to go off.
Decide where you are going to put it before mixing a batch.
Use a roller to spread the resin as this will be quick and less likely to move the cloth while you are working.
At this stage you are not trying to fill the weave, this is the bonding coat.
So, only enough resin to bond and wet it, then squeegee out any air bubbles, runs or sags.
The cloth should now appear transparent.
Amine Blush
After application and during the curing process, epoxy resin releases a wax-like 'film onto the surface called' Amine Blush '.
This amine blush will prevent subsequent layers of epoxy and other products fully adhering unless removed properly.
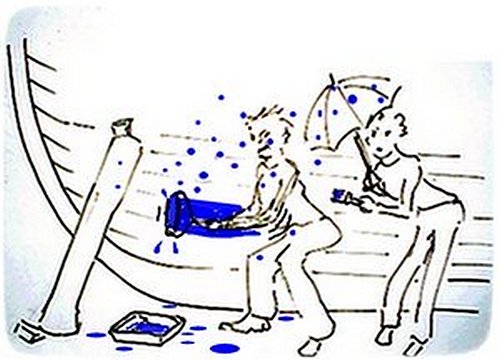
The best way to reduce blushing is to work in warm temperatures (the epoxy sets up fast, reducing the blush window) and with humidity at low levels.
It would be best to avoid conditions where moisture is coming out of the air as temperatures fall.
Amine blush is water soluble so, thoroughly washing the cured epoxy with clean warm water, soap, and a stiff brush or Scotch-Brite ™ pad is the only way to completely remove it.
Sanding before removing the amine blush may sand the blush deeper into the surface making it much harder to remove.
Even those products labeled as 'amine blush free' or 'no blush formula' are best washed.
Solvents like Acetone will not remove the blush.
If there is a good reason not to get your project wet, you can use West System’s “Peel Ply”.
Peel ply is a finely woven nylon fabric that will not bond to epoxy, however, the amine blush forms on the peel ply, not on your cured epoxy.
Simply follow the instructions to apply peel ply, ensure that the peel ply is thoroughly wetted out, let your epoxy cure and then remove the peel ply once cured and before applying the next coating, the blush will have formed on the peel ply not on the epoxy below.
Another advantage to using peel ply is that it’s fine woven pattern is impressed into the epoxy coating, creating a ready to bond to, graded, textured surface.
affiliate linksFilling

This next coat when applying glass cloth is to fill out and smooth the weave of the cloth.
The sooner this coat is applied after the last one has cured the better.
Any more than 24 hours between coast and the surface will need to be cleaned to remove any possible dirt, debris and more importantly, amine blush.
There is no need to sand between coats, however if it is necessary, make sure not to sand through the weave of the cloth.
If you use a roller for this coat you may need to 'tip' the surface to get rid of stipples.
Again, do not apply too much resin, better to give it two coats rather than risk having runs and sags.
Applying Glass Cloth, Finishing Coat
The final coat or coats when applying glass cloth, build up enough resin to allow for sanding to a smooth finishing without the prospect of cutting into the actual cloth.
This is applied in the same way as the previous coat.
Again beware of using too much resin and if using a roller 'tip' it smooth to reduce the amount of sanding needed.
The final coat when applying glass cloth must be allow to cure properly before sanding, at least overnight or 24 hours, depending on the cure time, check the manufacturers instructions.
Epoxy Resins CONTAIN Bisphenol A .
Before using epoxies you should carefully read the manufacturers instructions especially with regard to safety and protective clothing .
Previous posts
See What Others Have Posted
hull building
I am ready to start building the solar house boat I have designed.
I have gone with a hull shaped like a jon boat.
I am building it out of wood …
Using 4mm, 3 ply Meranti 1088 w/ FG epoxy encapsulation
I have read a number of articles in which it was stated that a stitch and glue boat could be constructed using standard 1/4” exterior grade plywood as …


You might like these
Wooden Boat Restoration, Repair and Maintainence.
Wooden boat restoration, how to fix up an old wooden boat, one of the cheapest ways to get afloat and have a boat to be proud of.
Epoxy Resin for DIY Wooden Boat Building.
A guide to the epoxy resins and sustainable enrtopy resins to use when building wooden boats with marine plywood.
Wood Rot Repair and Treatment
Wood rot in wooden boats, how to treat, repair and replace rotten timbers in a wooden boat
Vintage wood Boat Bottom Replacement
The ultimate bottom repair for a vintage wood boat, when re-caulking the planking on your classic antique boat
Surveying a wood boat
The problem areas to look out for when surveying an old wooden boat.


Warning
Epoxy Resins containBisphenol A.
Before using epoxies you should consider the flood of new scientific evidence on adverse effects of BPA.
Recent Articles
-
Reader's Boat Photos
Aug 23, 25 09:08 AM
 Gallery of Readers uploaded Photos
 -
The Sliding Bevel
Jun 19, 25 02:52 AM
 By Robin Gates
The Sliding Bevel: A Boatbuilder’s Tool for Precision
For angles other than the perpendicular of the try-square and 45 degrees of a mitre-square, the essential measuring tool is a slidin…
-
Winter Bilge Issues
Jun 18, 25 07:34 AM
 By Adrian Morgan
Winter Bilge Issues: Can a Classic Boat Spend Too Long Ashore?
Beware the score of too long ashore, Adrian Morgan warns us…
Continue reading "Winter Bilge Issues"
-
How to Make Multipurpose Wax Oil
May 13, 25 02:37 AM
 By Robin Gates
How to Make Multipurpose Wax Oil: Guide for Boat Builders
A Guide for boatbuilders on how to make multipurpose wax oil serving to lubricate tools and inhibit rust…
Continue reading "How…
-
Award Winning Junk Rigged Micro Yacht
Apr 16, 25 02:54 AM
 By Nic Compton
Award Winning Junk Rigged Micro Yacht: Nikos Daroukakis’ Nootka
Inspired by an aboriginal mix of styles and boatbuilding philosophies, Nootka is a self-built, own-design combination of m…
You might like these
Painting Your Wooden Boat.
Painting a wood boat, advice on how to restore, repair and maintenance paint jobs on hulls and topsides to get a yacht finish.
Boat Paint for Back Yard Boa Bbuilders.
Practical advice on Paint for wooden boats, what to look for and what to avoid
How to remove wood stains
How to remove and clean wood stains from your wooden boat before re-varnishing using wood bleach such as oxalic acid
Gilding Boat Lettering and Cove Lines.
Gilding, the finishing touch, how to apply gold leaf to your Boat name lettering and cove line
Non Slip Varnish, for Your Boat
A simple attractive method for making your own clear anti skid varnished areas, such as the cabin sole or hatch cover non slip.


This work is licensed under a Creative Commons Attribution-ShareAlike 2.0 UK: England & Wales License.
I am perfectly aware that the majority of Wooden Boat aficionados are sensible folk.
However, I need to point out that I am an amateur wooden boat enthusiast simply writing in order to try to help other amateur wooden boat enthusiasts.
And while I take every care to ensure that the information in DIY Wood Boat.com is correct, anyone acting on the information on this website does so at their own risk.