- Home
- Your Boats
- Portholes
Portholes, Portlights and Deadlights
Whether you call it a porthole, portlight, deadlight or just plain window, making and installation has, since the development of clear ‘plastics’ become much simpler and cheaper for the amateur boat builder/renovator.
Much as I hate to admit it, ‘plastics’ such as Plexiglas or Lexan are so easy to work with that using shatterproof glass is no longer a viable option.
While acrylic portlights will, unlike glass eventually get scratched and crazed, replacing them is cheap and easy.
So, the main problem for the self-builder is making sure that they don’t leak, especially the ones above your bunk.
Light Below.
We all know what a window is but
what about those
other boating terms.
- PORTHOLE is a general term originally used to describe more or less any opening in the hull such as a gun-port.
- DEADLIGHTS are the ‘windows’ which are fixed and non-opening.
- PORTLIGHTS can be opened.
- DECK-LIGHTS are prisms of rectangular or round shaped glass or acrylic set flush into the deck to give a constant stream of light below deck.
There is a wide variety of manufactured portholes on the market but the better ones are not cheap and the majority are aimed at the ‘plastic’ boat market.
Bronze and brass ports can be bought but they again are expensive, even the price of second hand and reclaimed portholes is becoming prohibitive.
For light weight and low cost, deadlights of acrylic or lexan, through fastened directly to the cabin trunk side can be most satisfactory.
It is possible to make opening portlights but I haven’t seen any designs that would be suitable for a boat which, might venture out to sea.
If you do want an opening port the best bet is a manufactured one, preferably in bronze.
However, if they are installed on a sloping surface, facing up, water will collect in the spigot and this will drain inside when it is opened.
But it will only be a small amount, nothing to worry about unless someone is sleeping directly underneath.
Deck-light prisms are rarely used today because it is easier to fit electric lights to those dark areas, such as the fore peak, thus avoiding having another potential source of leaks.
They are none the less still useful and attractive.
They prisms are generally triangular or acorn shaped with a bronze fitting and trim-ring and are bedded in rubber then screwed down into the deck.
They can be made from blocks of acrylic and some bronze sheet cut to make your own trim.
Other ways to allow light below include;
- Making a hatch cover with a Lexan or acrylic insert.
- An acrylic panel in place of a hatch board and a panel to slide into the sliding-hatch groove for those times when the hatch needs to be closed.
- An etched acrylic window in cabin doors.
Acrylic / Polycarbonate?
Sorting through the claims of the various manufacturers for their branded products can be confusing.
Polycarbonate is much easier to fabricate than acrylic and does have incredible initial strength.
However, acrylic is what all the major manufacturers use for their offshore and bluewater marine products.
- Acrylic is more scratch resistant than standard polycarbonate.
- It is much more resistant to Ultra Violet radiation (sunlight).
- And it is less expensive than Polycarbonate.
So, you pays your money and you takes your choice.
It is worth mentioning here that these ‘plastics’ will expand and contract at a different rate to the surrounding wood, but more on that later.
affiliate linksSealants.
Today’s modern sealants give wooden boat builders and restorers another advantage over the traditional methods of waterproofing joints.
The old fashioned tar and petroleum based compounds tend to dry out over time thus losing their effectiveness.
Modern sealants, on the other hand, if properly applied should remain watertight, providing they are not disturbed.
Using a light color or clear sealant will help reduce any disturbance caused sunlight warming any exposed areas.
There are some compounds such a poly-sulfides and polyurethanes which can affect some plastics making them brittle.
Among the better compounds for bonding Acrylic or Polycarbonate are, Sika Flex 295 UV, Dow 795 and GE SG-4000.
Don’t try to get away with using the type of compound sold for sealing bath tubs.
But, whatever compound you chose it is very important to have a clean bonding area.
Even finger marks will affect the cure.
But beware of using harsh
solvents and definitely do not
use acetone on plastics.
If you are re-bedding a porthole you must remove all the old sealant, no new sealant will not adhere to old cured stuff, even if it is the same make.
It is also best if the sealant is applied and allowed to cure in warm conditions.
However, even with the best modern compounds leaks can occur due to mechanical failure.
Bedding components can pull apart under strain, if poorly attached, due to flexing and through differing rates of expansion between the plastic and the surrounds.
Cutting / Bending.
Your new plastic glazing should fit the opening with allowance for the different expansion and contraction rates of the plastic and the surround.
And bolt holes should be drilled oversize for the same reason.
The amount allowed for expansion and contraction will depend on the size of the pane.
The larger the area of the porthole the more you should allow.
If replacing an old pane check that it is a good fit before using it as a pattern, if not make a new pattern from stiff card.
You can cut and drill acrylics and polycarbonates using ordinary woodworking tools.
For cutting there are special blades available which are designed for cutting plastics but a fine toothed hacksaw blade will work just as well.
If using an electrical jigsaw use a slow speed and keep the plastic cool so it does not start to melt.
On my first attempt to cut out a porthole with a jigsaw, small blobs of softened plastic were cooling and resealing the cut behind the blade, which meant I had to go back round and cut the blobs and then spend time cleaning the edges.
But whether cutting by hand or with power the edges must be well supported to prevent chipping.
And make sure the plastic is resting on a clean surface to prevent scratching.
Leave the protective film on the plastic until you are ready to fit the pane.
Once cut, clean up the edge to get rid of any chips or blobs as these could lead to cracking.
Use a fine edged file and sand paper.
It is possible to bend most plastics but trying to put much bend while cold can affect the integrity of the material.
Both polycarbonates and polyacrylates can be bent using heat but this is rather tricky.
It can be done using a heat gun.
The problem is not to overheat as this can cause the plastics to got cloudy or even bubble.
The next problem is maintaining an even heat across the area you wish to bend.
The piece needs to be firmly clamped and it is best to do the heating indoors away from cooling breezes.
A simple bend can be formed over the edge of a bench.
For more gentle longer bends you are really going to need a former.
Don’t try to force the bending, when the plastic is ready it will bend with a small amount of pressure.
Try to keep the pressure and the heat evenly along the length of the bend.
The thicker the plastic the more heating it will require, you may have to heat both sides.
Porthole Frames / Fixing.
When designing portholes there are a number of things to keep in mind.
Much will depend on the style of your boat and the type of boating you intend doing.
If for instance you intend sailing in all weathers at sea you need to take into consideration the possibility of a rogue wave smashing into that porthole.
While most plastics are pretty dammed strong they will flex, so that wave hitting it may not break it but it might just flex it enough to break the seal around the rim.
Also the large window which would be perfect on a houseboat won’t fit with the traditional look of a classic motor or sail boat.
And of course you don’t want to disfigure a beautiful wooden boat with an ugly set of portlights.
The porthole on a sea going vessel is best fitted to the outside of the cabin trunk so it is not relying on the fasteners alone.
And you should make the overlapping lip as large as possible.
The plastic may be fitted into a rabbet around the opening and the joint can be covered with a frame or bezel bedded with sealant.
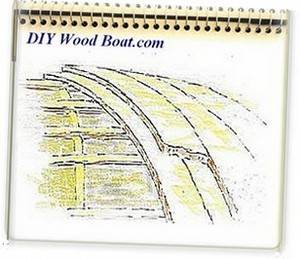
On the other hand, portholes installed on the inside of the trunk can be very attractive, especially if the outside of the opening is beveled or routed to a pleasing radius for drainage.
It is always best if through bolts are used regardless of whether the frames are wood or metal and even better if there is a frame inside and outside.
Frames can be routed from plywood, or built up from solid wood with mitered corners.
If any of the caulking is going to be visible through the plastic, paint a white border on the inside perimeter of the plastic before installation it will look much neater than the sealant.
Before adding the sealant, bolt the pane in place and lay masking tape around the edge of the pane, this will make cleaning up much easier when the sealant has cured.
When you are ready to fit the porthole, wipe all the surfaces with rubbing alcohol, apply plenty of sealant and don’t forget to put a blob of sealant under the head of each fastener.
Don’t harden up the fasteners at this stage, just nip them so the sealant squeezes out from under every edge.
Then allow the silicone to cure for half an hour before snuggling the fasteners down.
Once the sealant is cured, run a blade around the edges, then peel away the masking tape.
Providing the initial installation is done properly you should have a porthole which will remain leak proof for many years.
affiliate links
Previous posts
See What Others Have Posted
Clear Acrylic or Lexan for forward hatch port?
I am building a new hatch for my sailboat.
I want to install a port for light(approx size 24 x24).
What material is best (acrylic, lexan)?
…
New Timber Windows
We are replacing the entire superstructure on our boat and will need new timber windows.
We do not have the money to buy new.
We are competent …


"Our voyage had commenced, and at last we were away, gliding through
the clean water, past the reeds.
Care was lifted from our shoulders, for we were free from advice,
pessimism, officialism, heat and hot air."
(K.
Adlard Coles)
You might like these
Boat Books for Wooden Boat Builders
Boat Books a series of boat books based on some of the 1960's, classic, Free Boat Plans that were published in magazines such as "Popular Mechanics", "Popular Science" and the "Boat Builder Handbook".
Ring Nails for Marine Fastening.
Ring Nails sometimes call Gripfast or ring shank, silicon bronze boat nails are renowned for their holding power. but how to get them out?
The Ashcroft Method of Planking a Wooden Boat
The Ashcroft method of building small wooden boats, an early from of cold moulding using thin layers of wood with the layers all running same direction.
Knotty wood, problems with boat building timber.
Knotty wood, how to avoid structural problems with knots in lumber when using softwood timber for fitting out and boat joinery
Build a Boat, tips for the DIY Wooden Boat Builder.
How to Build a Boat, Wooden Boat Building methods for the DIY, backyard, self-builders explained, carvel, lapstrake and plywood
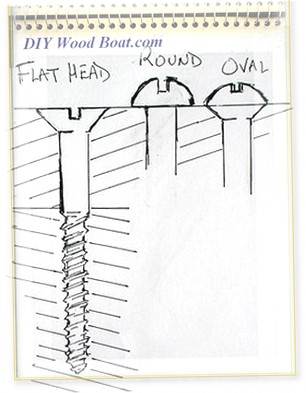
Wood Screws for Boat Building and Repair.
Wood Screws are the most widely used and versatile fasteners used on wooden boats. Which type to use and how to use them
Wood, Environmentally Friendly Boat Building Lumber.
Make sure that the Wood that you buy and use is sustainably grown and harvested.

Recent Articles
-
Reader's Boat Photos
Aug 23, 25 09:08 AM
 Gallery of Readers uploaded Photos
 -
The Sliding Bevel
Jun 19, 25 02:52 AM
 By Robin Gates
The Sliding Bevel: A Boatbuilder’s Tool for Precision
For angles other than the perpendicular of the try-square and 45 degrees of a mitre-square, the essential measuring tool is a slidin…
-
Winter Bilge Issues
Jun 18, 25 07:34 AM
 By Adrian Morgan
Winter Bilge Issues: Can a Classic Boat Spend Too Long Ashore?
Beware the score of too long ashore, Adrian Morgan warns us…
Continue reading "Winter Bilge Issues"
You might like these
Cold Water Boating
Safety precautions for cold water boating and winter sailing
How to Mooring Your Boat.
Avoid embarrassment when Mooring and Docking, learn how to get it right safely with the correct lines and at least appear competent.
Anchor Types
Anchor types, how to choose the type, size and style of ground tackle, chain and rode to anchor your boat safely.
Anchoring Techniques
Anchoring techniques, best practices to ensure the safety of you and your boat, and how to retrieve a snagged hook.
Boat Winches
Boat Winches, sheet, anchor, halyard and trailer winches for Wooden boats
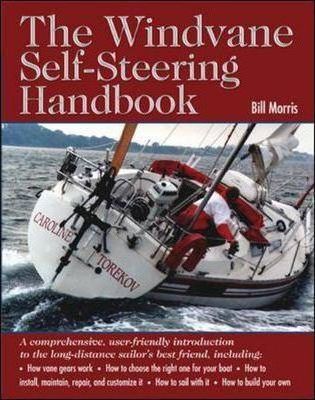
Wind Vane Self Steering Gear for Sailboats
Wind vane self steering, what you need to know if you want to make your own windvane for singlehanded and shorthanded sailing on your wooden sailboat.
Wooden Cabin Cruisers
Building or restoring cabin cruisers Tips and suggestions for fitting out and equiping your wood boat.
Green Boating with Uncle Charlie.
Green boating for my Uncle Charlie is nothing to do with any "trendy environmental initiatives" but just an old fashioned, frugal way of living and a love of sailing old wooden boats.
Marinas with Uncle Charlie.
Uncle Charlie and family avoid marinas not only because of the cost but because there is always an audience.
The Tao of Wooden Boat Sailing and Boat Building.
For my Uncle Charlie the Tao of boating isn't a consciously practiced Zen, neither does he regard himself as spiritually enlightened yet he has a self contained harmony a Yin Yang balace.


This work is licensed under a Creative Commons Attribution-ShareAlike 2.0 UK: England & Wales License.
I am perfectly aware that the majority of Wooden Boat aficionados are sensible folk.
However, I need to point out that I am an amateur wooden boat enthusiast simply writing in order to try to help other amateur wooden boat enthusiasts.
And while I take every care to ensure that the information in DIY Wood Boat.com is correct, anyone acting on the information on this website does so at their own risk.