- Home
- Boat Building
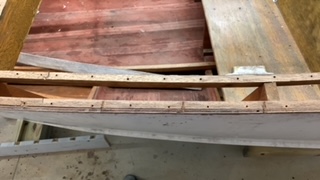
- Restoration
- Paint
- Bottom Paint
- Painting
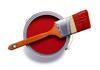
Painting your wooden boat.
Not everyone enjoys painting or watching it dry.
But there are few wooden boat owners who don't relish the moment when they step back and admire the results.
All the effort involved in preparing and finishing will then be seen to have been worth it.
Surface Preparation.
The promises made on the tin are worthless unless the surface is properly prepared.
Even where you are merely touching up sound paint the surface must be sanded to provide a key so the new will adhere well and survive for more than one season.
This is important regardless of whether you are aiming to achieve a smooth glossy 'yacht' finish or just a protective 'working boat' finish.
A disc sander can be used with care on flat areas, but as there aren't many of those on a boat a better option is to use a palm-sized orbital sander.
However, I have found that it is actually faster and more efficient to sand by hand.
Normally I just use a sheet of production sand paper folded in four, you can if you wish use a backing pad, preferably one which is firm yet flexible enough to conform to any curvature of the wood.
For sound paint a 120-grit paper should be OK, for rougher patches you can use the coarser 100 or even 80 grit.
For varnish work always sand along the direction of the grain of the wood and not across it, even for paint work sanding along the grain will make any scratching less obvious.
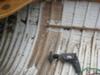
Anywhere where the paint is lifting, blistered or has flaked using scrapers is a better way to fair and smooth the surface. Scraping is not quite as simple as sanding, so take care and keep the scraper sharp.
Begin by scraping the old flakes off then feather and smooth to blend the exposed area level with the surroundings.
Then finish off by sanding.
Now that you have the surface rubbed down to your satisfaction do any filling that is needed.
Before beginning painting clean off all traces of dust.
A vacuum cleaner is the most effective method for removing sanding dust.
Finish off by wiping the surface with a 'tack rag', a lint free cloth damped with white spirit
affiliate linksPriming.
All bare wood needs a primer coat before starting on any top coats, regardless of what it may say on the tin.
You'll need at least one coat of primer preferably two.
Many owners and builders of solid wood boats like to protect the wood from worms, marine borers and the like.
There are several wood treatment products available but for me good old cheap creosote is favorite.
Not only is creosote cheap and effective against borers but it will also penetrate well into the wood.
However, only oil based finishes can be used over it and it must be given plenty of time to dry thoroughly, paint applied onto wet creosote will never dry and I mean never.
When selecting a primer for your hull I would recommend the metallic gray type.
These primers contain millions of microscopic flat aluminium particles which, so I'm informed, make them more impervious to water penetration than the pink primers.
The gray primers also contain anti-mold, biocide agents.
For best results apply at least three coats below the waterline and at least two above, sanding with 120 grit between coats.
Sanding will produce a lot of very fine gray dust, so wear a face mask, and if its at all windy watch where the dust is settling, your neighbor wont be happy if his sparkling white topsides are sprinkled with dull gray.
With the gray primers there is a time limit between sanding and applying the next coat, so check the instructions on the tin.
affiliate linksTop Coat Painting.
First, I must point out that I prefer to use a brush rather than a roller.
Excellent results can be obtained with the roll and tip method, however this is best done with a helper.
New brushes should be given a good clean then hung overnight to dry this will get rid of any shop soil and help prevent bristle loss.
On wooden boats it is best to stick to the traditional type of oil based finishes, two part paints are not only expensive but also tend to be less flexible.
Because wooden boats flex and work, especially along the seams the expensive finishes will not last any longer than the traditional types.
For the most durable and even, color coverage, most marine coatings will require three coats, sanding between each coat.
Allow each coat 24 hours to dry, sand lightly and clean off all dust between coats.
There is no hard and fast rule about where to start but generally starting at the top and working down seems to be the best approach.
The main thing is to work away from the fresh wet area so you don't drip on it or catch it with a sleeve, or even sit on it as I once did.
To get a good coverage without any runs, sags or drag marks,
- Apply the thinnest of films, don't overload your brush,
- Apply and spread a small area at a time, brushing it out vertically, horizontally and diagonally,
- Keep a wetted edge.
In order to keep that wetted edge it may be necessary to thin the paint accordingly.
Paint will dry faster on warm, dry days when there is a bit of a breeze especially on horizontal surfaces.
There are some special liquid additive that can helps with the flow and slow the drying, however these are just thinners which have a high oil content.
I don't like the edge that is
left when using
masking tape.
So, I try to keep any color change to lines where there is a definite change in surface direction, as in the joint between cabin side and deck.
And I always overlap the two colors finishing with the stronger color.
These joint areas are places which are particularly vulnerable to water ingress, so it is important that there are no gaps in the paint.
affiliate linksRoller and Tip.

I have never been keen on using a roller.
It is so easy to end up with a pebble dash finish.
Advocates say that it is a quicker method than brushing, yet to get a good finish requires two people, one rolling on the paint while another follows closely with a bush to do the 'tipping'.
And all the awkward spots and
edges still need to
brushed.
Still, I suppose that if you have one or two helpers who are not very good at brushing it might be a good way to get everyone involved.
The person doing the 'tipping' should be the best at using a brush.
The person on the roller wets it out thoroughly taking care not to spray drips
The 'tipper' then follows closely behind lightly brushing it out.
It is important that the two work in consort, so that the tipper can keep up with the roller and always be working on wet areas.
affiliate linksNATIVE ASYNC

Previous posts
See What Others Have Posted
Painting a wooden boat.
I have renovated a small wooden sailing dingy.
The paint has been stripped and I have placed an epoxy over the underside of the boat.
The paint …
Priming
I am about to prime my boat, is it alright to use hempel under water primer all over the boat?
Painting
Hi my name is Daniel, I have a question.
I am the owner of wooden boat, Trojan 1970 38 feet long and I want to paint the interior where the motor is …
How to save a bomb next time you paint your boat
Keeping the boat looking good and well maintained means painting, a job that takes a lot of time and consumes a big chunk of our budget every year.
…
Prevent Paint from Clogging Sandpaper
Sanding Your Boat
If you are sanding to remove large areas with a belt, orbital or vibrator sander and paint builds up quickly on the sand paper. …
Prevent Paint Skinning Over in a Can
Paint will skin in a can from moisture vapor in the air, so you must isolate the paint from the air.
Inert gases, such as nitrogen and argon are great, …
Forget long and painstaking sanding using sanders
Use a new tool Roto rasp with your angle grinder and your will cut time and effort needed several times.
It will never burn your surface and it can …
After she's stripped down completely
I haven't removed all of the old paint yet, but I think I've figured out what to do.
I used a grinder on the flat surfaces, and will be following …

Recent Articles
-
Wooden Boat Events 2024
Apr 14, 24 05:15 AM
Wooden Boat Events 2024 calendar, traditional and classic boat festivals and regattas from around the world
You might like these
DIY Woodboat Finish Questions
Woodboat Finish questions and answers to your Wooden Boat painting and varnishing problems in a free, no frills, no need to sign up Forum.
Boat Paint for Back Yard Boa Bbuilders.
Practical advice on Paint for wooden boats, what to look for and what to avoid
How to remove wood stains
How to remove and clean wood stains from your wooden boat before re-varnishing using wood bleach such as oxalic acid
Non Slip Varnish, for Your Boat
A simple attractive method for making your own clear anti skid varnished areas, such as the cabin sole or hatch cover non slip.
Bottom Paint, Antifouling for Wooden Boats.
Bottom Paint, which if any antifouling do you need on your wooden boat will depend on where and how you used her, and how much you want to lessen the impact on the environment.
Boat varnish for wooden boats
Boat Varnish, how to apply to a wooden boat and varnishing advice on restoring, repairing and maintaining your bright-work.
Gilding Boat Lettering and Cove Lines.
Gilding, the finishing touch, how to apply gold leaf to your Boat name lettering and cove line


Recent Articles
-
Wooden Boat Events 2024
Apr 14, 24 05:15 AM
Wooden Boat Events 2024 calendar, traditional and classic boat festivals and regattas from around the world -
14’ 1956 Chris Craft, side rail how should it be attached?
Apr 12, 24 03:38 AM
 Removing the old side rail most of the screws went between the top deck/skin 1/4” plywood and the side of the hull. See photo, is this correct? I would
 -
How to laminate plywood on the hull
Apr 10, 24 03:46 AM
I'm working on replacing the bottom of 18' 1969 runabout that has a deep-V plywood hull. It had a 1/2 mahogany plywood bottom that they somehow got to
You might like these
Woodboat Restoration questions forum
Woodboat restoration questions Forum, get advice about your Wooden Boat problems in a free, no frills, no need to sign up forum
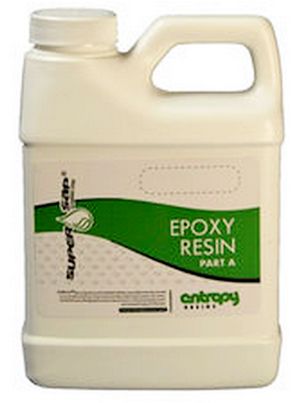
Epoxy Resin for DIY Wooden Boat Building.
A guide to the epoxy resins and sustainable enrtopy resins to use when building wooden boats with marine plywood.
Wood Rot Repair and Treatment
Wood rot in wooden boats, how to treat, repair and replace rotten timbers in a wooden boat
Vintage wood Boat Bottom Replacement
The ultimate bottom repair for a vintage wood boat, when re-caulking the planking on your classic antique boat
Surveying a wood boat
The problem areas to look out for when surveying an old wooden boat.
Initial Boat Survey Checklist
The initial survey questions to ask when looking at a Wooden Boat with a view to restoring or renovating
Stem and Stern Post Rebuilding
Repairs to the Stem of a wooden boat can be undertaken by the amateur with a little care and attention.
Repair Plywood Boats.
How to repair plywood rot or delamination with marine ply, especially on the hull of a small boat.
Planking a Carvel Boat
How to replace damaged or unsound carvel Planking, a guide for any reasonably competent amateur.
Wedge Seam Construction
Wedge Seam Construction method for wooden boat building and glued wedging or ‘splining’ as a restoration technique for restoring old carvel planking seams.


This work is licensed under a Creative Commons Attribution-ShareAlike 2.0 UK: England & Wales License.
I am perfectly aware that the majority of Wooden Boat aficionados are sensible folk.
However, I need to point out that I am an amateur wooden boat enthusiast simply writing in order to try to help other amateur wooden boat enthusiasts.
And while I take every care to ensure that the information in DIY Wood Boat.com is correct, anyone acting on the information on this website does so at their own risk.