- Home
- Boat Building
- Restoration
- Caulking
How to Caulk and Carvel Hull
Anyone can caulk a boat, there is no magic involved. If I could do it, so can you.
On a new boat with its pristine seams it is pretty straight forward.
On an older boat it is a bit trickier.
However, anyone with a common sense modicum (which unfortunately isn't all that common) will have no trouble doing a competent job.
The main thing to be aware of is, not to over caulk, this could lead to strained frames as the planking 'takes up'.
Oakum, which is made from hemp soaked in pine tar, is normally only used on the larger vessels with planks over two inches thick.
For most small to medium boats; cotton, is by far the easier more versatile material to use.
Preparing to Caulk
If you are working on a newly built hull you may need to open up any tight seams.
This can be done with either a dumb
iron or a raking
tool.
The dumb iron works best on the softer woods, the raking iron on
hardwoods.
If re-caulking, make sure to clean out all the old compound and cotton.
 Caulking Tools
If you are going to use oil based putty as the caulking compound it is a good idea to prime the seams.
This can be done with an oil based paint.
It's a good idea to prime again once the cotton is in place.
This is probably the better method when re-caulking an old boat. If you intend to use a synthetic sealant such as 3M 5200 check the manufacturers' recommendations for priming.
My own preference is for old fashioned, cheap and readily available linseed oil putty mixed with red lead powder.
Paying

When it's time to start inserting the cotton where do you start?
Some like to do all the butt ends first, then start on the lower seams and finish off with the rabbet and garboard seam.
But, I do not see any harm in starting above the water line if you want to get into the swing of it first.
How many strands of cotton you use will depend on the size of the seams.
Ideally the cotton should fill the deepest third of the seam.
This means that when tapping it home the iron should go in by about two thirds of the plank thickness.
Add or subtract strands as needed.
But always remember , that it is to be tapped in, not hammered.
Do not over do it , that cotton is going to swell when wet.
And do not forget which seams have been done, you do not want to caulk a seam twice.
Some authorities suggest laying out enough cotton to do a full seam.
That is fine if you are laying it out in a perfectly clean floor.
The cotton is rather hairy and will pick up any and every bit of dirt or wood shavings from the floor.
I found that it was better to feed it straight from the ball, but keeping the ball in a box which can be pushed along with your foot as you go.
If you have to join strands mid seam do not tie a knot, this will produce a thick, hard lump.
Simply roll the ends together.
Start off by using the paying iron to push the cotton into a foot or two of the seam.
Then go back and using a rocking action with the iron, tap the cotton home with the mallet.
If there are any wide seams leave them for last.
By caulking all the tight seams first you could find that this has caused the wider ones to close up.
Wide seams can be done in two runs, increasing the number of strands on the top.
The reason a carvel planked boat keeps the water out is that both the wood and the cotton swell when wet, effectively sealing the joints.
The caulking compound while it does help waterproof the seam is there mainly to help hold the cotton in place and fill those gaps.
affiliate linksPutty
The traditional compound for stopping seams is linseed oil putty mixed with red led powder.
When mixing this putty take a tennis ball sized dollop of the putty, mix enough red lead powder to give an even red color, add linseed oil, if needed, to keep it soft.
Then add a thumb nail sized dollop of multi-purpose grease to the putty, mix it in well and push the putty into the seam with a putty knife.
The grease will help keep the putty soft and flexible thus preventing hardening and cracking later.
It has recently been brought to my attention by Bill in Canada, how difficult it is to buy red lead powder in many countries.
Here in the UK it is still possible to obtain many of these traditional supplies from specialists such as Traditional Boat Supplies
Fortunately there are alternative commercially available oil based compounds such as those by Pettit and Interlux.
There are plenty of silicon and polysulphide substances around, these are probably fine if you are caulking clean oil free new wood.
But on an old boat's seams it is extremely unlikely that the planking has not absorbed some oil or other substances that would make using a synthetic compound worse than useless.
The seams most likely to be oily are the garboard seams, which are also the seams you do not want to have future troubles with.
And some of these compounds, when they do stick, adhere a bit too well.
By the way, do not be fooled into believing that any of these 'magical mastic' will eliminate the need for the cotton.
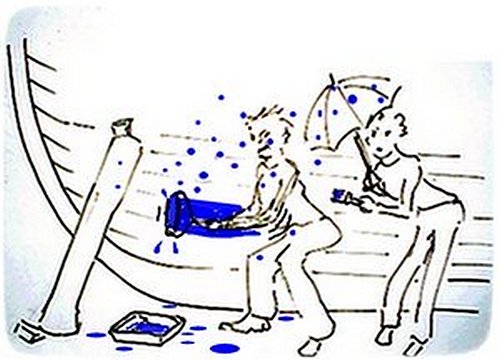
Launch day
When it comes to launch day you might find that some of the seams have opened up.
Do not be tempted to add any more caulking cotton.
You can add some more of the paying compound but this will probably end up being squeezes out as the wood and cotton take up.
Providing the gaps are not excessive it's better to use a temporary method of stopping.
Tape over the cracks with masking tape, this will slow water intake sufficiently while the planks take up.
Or fill the cracks with soap, use bar soap rubbed into the crevices this will eventually just wash away.
Or you could use Slick Seam compound
Having said all that, I do not mind admitting that when I launched Mignonne after her rebuild I was as nervous as any expectant father.
Fortunately the yard crew were aware of the problems affecting wooden boats and allowed her to sit in the hoist slings for some time before setting us adrift.
How quickly she takes up will depend on the wood of the planking.
Soft woods will usually take up faster than hardwood.
Mignonne with her hardwood planks took a month before the seepage slowed appreciably.
And now no more than a cup full per week gets in.
Considering that this was my first attempt to re-caulk a complete hull, the fact that she did eventually become water tight just goes to show that anyone, with a little care can do it.
affiliate linksNATIVE ASYNC

Previous posts
See What Others Have Posted
Fixing a rough boat cheaply in order to move it
There is an old long keel sailing yacht in poor condition in the yard of a UK marina.
The yard is destined to become a high rise luxury hotel so the …
New Old boat owner
Nice.article,
I just bought a 1958 Chris Craft.
I am trying to figure do I calk or install a 5200 bottom on.
Sounds to me this may be the …
Launch Day
With a boat which has been laid up for the winter, it's a good idea to have some sawdust and a broom on hand.
After the boat is in the water, cast …
Caulking methods
Hi. I am restoring a 1930 Richardson "Little Giant" which was totally rotton.
I have now reached a point where I need some advice.
The hull is made …

Caulking epoxy or filler?
What is the best type of caulking epoxy or filler for the hull of a 55 ft 1960 wooden boat?
Best caulking product for sealing wood boats
Good evening
What is the best product on the market for caulking seams on a wooden boat.
Maureen
Comments
Caulking Products
by: …
Cauking a thoroughly dried-out hull.
Good day boaters,
I have recently taken on a 13ton Hillyard ketch which has been left ashore in Spain for 7 years and so is completely dried out. …
Replacing screws after painting/varnishing wooden pram
What putty or filler product/products are best when replacing screws after painting/varnishing my plywood 9'pram?
Some screws are stainless, some silicone …

Recent Articles
-
Wooden Boat Events 2024
Apr 14, 24 05:15 AM
Wooden Boat Events 2024 calendar, traditional and classic boat festivals and regattas from around the world
You might like these
Plywood and Veneer Guide for Marine use.
A guide to plywood for boat building and why you should use the best marine grade you can afford.
DIY Woodboat Building Questions
Woodboat building questions a Forum for wooden boat building, plans, lumber, caulking compounds and other boat building problems.
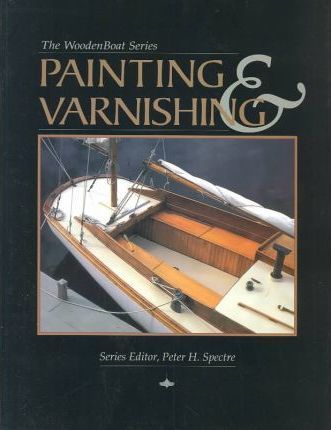
Boat Books for Wooden Boat Builders
Boat Books a series of boat books based on some of the 1960's, classic, Free Boat Plans that were published in magazines such as "Popular Mechanics", "Popular Science" and the "Boat Builder Handbook".
Build a Boat, tips for the DIY Wooden Boat Builder.
How to Build a Boat, Wooden Boat Building methods for the DIY, backyard, self-builders explained, carvel, lapstrake and plywood
Clench Nails, Fastening for Small Wooden Boats.
How to use Clench Nails, these provide a fast reliable method for fastening small wooden boats.
Wood Screws for Boat Building and Repair.
Wood Screws are the most widely used and versatile fasteners used on wooden boats. Which type to use and how to use them
Timber, Lumber for Boat Building.
A brief description of the most common Timber used for building Wooden Boats how to choose wood for your project boat
Timber Properties
A brief guide to timber properties and wood, characteristics such as strength, stiffness and elasticity for choosing lumber for wooden boat building and restoration.
Rivets and Copper Rove Wood Boat Fastenings.
How to use Copper Rivets and Roves construction guide to fasteners on your wooden boat.
Ring Nails for Marine Fastening.
Ring Nails sometimes call Gripfast or ring shank, silicon bronze boat nails are renowned for their holding power. but how to get them out?


You might like these
DIY Woodboat Finish Questions
Woodboat Finish questions and answers to your Wooden Boat painting and varnishing problems in a free, no frills, no need to sign up Forum.
Painting Your Wooden Boat.
Painting a wood boat, advice on how to restore, repair and maintenance paint jobs on hulls and topsides to get a yacht finish.
Boat Paint for Back Yard Boa Bbuilders.
Practical advice on Paint for wooden boats, what to look for and what to avoid
How to remove wood stains
How to remove and clean wood stains from your wooden boat before re-varnishing using wood bleach such as oxalic acid
Non Slip Varnish, for Your Boat
A simple attractive method for making your own clear anti skid varnished areas, such as the cabin sole or hatch cover non slip.
Bottom Paint, Antifouling for Wooden Boats.
Bottom Paint, which if any antifouling do you need on your wooden boat will depend on where and how you used her, and how much you want to lessen the impact on the environment.
Boat varnish for wooden boats
Boat Varnish, how to apply to a wooden boat and varnishing advice on restoring, repairing and maintaining your bright-work.
Gilding Boat Lettering and Cove Lines.
Gilding, the finishing touch, how to apply gold leaf to your Boat name lettering and cove line


This work is licensed under a Creative Commons Attribution-ShareAlike 2.0 UK: England & Wales License.
I am perfectly aware that the majority of Wooden Boat aficionados are sensible folk.
However, I need to point out that I am an amateur wooden boat enthusiast simply writing in order to try to help other amateur wooden boat enthusiasts.
And while I take every care to ensure that the information in DIY Wood Boat.com is correct, anyone acting on the information on this website does so at their own risk.