How do you tighten clinkers?

by Tina
(Surrey, England)

Hi

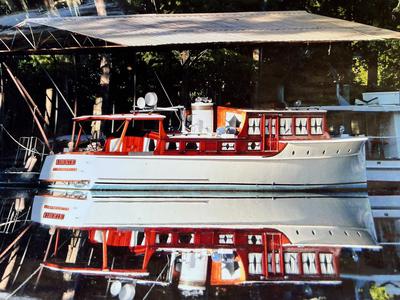
I have bought myself a lovely Norwegian snekke which I plan to maintain myself.

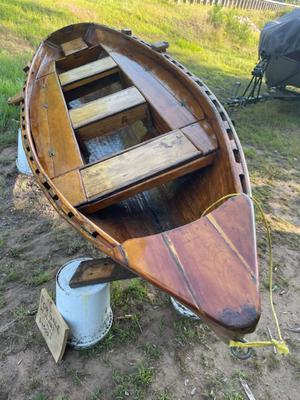
There's nothing wrong with her, but the last owner said he was planning on tightening the clinkers below the waterline as she leaks a bit.

I've asked a few boat people here, including professionals, and it seems to be a lost skill, as I haven't been able to meet anyone whose done it.

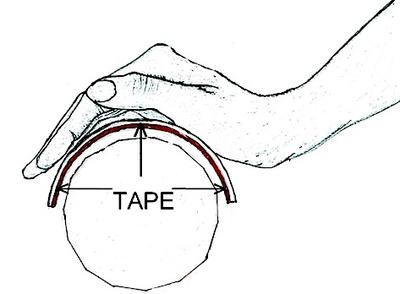
So, any advice on how I can tighten the clinkers?

Also, the previous owner suggested putting cooking fat on the seams before launching in the spring to help before the wood swells.

Have other people tried this or are there any other suggestions?

Many thanks

Tina


Comments for How do you tighten clinkers?

Click here to add your own comments

Mar 15, 2022
Tightening clinker
by: Pansy

I did a big job on my 14'-3" long clinker sailboat which was giving me problems with leaks - just as you describe.

It was quite simple really, but it did take two people to do the work.

What you do is place the boat on a sturdy hardback.

Ideally located at a level so one person works below the boat and the other works leaning over the gunwale.

Drill out all your old copper nails one at a time.

If they are really old like mine, it was possible to use a chizel or grinder to take off the rings from the inside and tap the nails out.

Check the diameter of the nails and use a wider diameter second time around.

Ideally you would take out 10 nails and then put in 10 new ones, in that way the boat wont change shape.

The bottom line is that the new nails will fill any gap around the holes and you put the new copper rings on tighter than the old ones.

If you are still leaking put some Tech 7 on the joints between the boards below the waterline.

Jun 19, 2018
FILL IT UP
by: Horace

I use to own a Clinker boat called a Seacraft.
I put the drain plugs in and filled up to or just above water line.
Boat leaked like a sieve for a few days and then not a drip.
That's what I was told to do when buying it in 1964.

Jan 05, 2015
how do you tighten clinkers
by: Anonymous

Hi Tina,
The best advice you have had up to now is to do nothing until you have sailed her for a few months.

It is not at all complicated' you just need to alter your attitude and stop looking for instant cure alls.

They don't exist.

Calm down, sail her, enjoy her and at the end of a few months you will have a much clearer picture.

The comment about brass screws is absolute nonsense, I am currently taking out brass screws which are close to eighty years old and they are still in very good condition.

The way they are used is the problem not the brass.

Don't under any circumstances use a modern product to seal the seams.

Doing this is condemning your lovely boat to death in about three years.

I can't stress enough.

Doing nothing is far, far better than doing the wrong thing.

Lots of people will try to sell you wonder products, please believe me the people who built your lovely boat had it spot on.

Stick to brass never switch to stainless steel, and before you tighten anything let her sit in the water for at least a month.

Much more likely to be the caulking or a bad repair than the fasteners on a boat of this quality.

Good luck


Jan 02, 2015
tightening rivets
by: Anonymous

With 2 of you, one backing up the rivet washer and one tapping the head on the outside, you can peen the head and cause the rivet to tighten.

Do very small taps, well centered on the head with a round peen hammer, enlarging the head slightly.

DO NOT hit hard as if you bend the rivet it will tighten initially then loosen as it straightens eventually.

Best is to launch it and see if it stops leaking after a bit.

Then if it does, let it dry out thoroughly before tightening the rivets.

Don't over do it!


Jan 02, 2015
the right caulk
by: charles gatchell

http://www.davisnet.com/marine/products/marine_product.asp?pnum=00730

Slick Seam

Slick Seam is an excellent underwater seam compound for wooden boats.

Requires no mixing, stirring or priming.

Made of wax, pure mineral products and silicate fibers,

Slick Seam adheres well to most solid surfaces whether dry, wet or even oil stained.

Applies easily and cleans up fast with mineral spirits.

Cures ready for paint in 30 minutes.

Stands up well to flexing and swelling wood.

One jar is enough to caulk the seams on most boats to 20'.

Slick Seam comes in a 16 ounce jar.


Jan 02, 2015
Patience is a Virtue
by: Anonymous

I have previously solved such issues by simply launching / using the boat.

If the overall leakage is workable give the boat a couple days in the water.

The wood will likely swell into it's own skin and seal the leaks, naturally.


Jan 02, 2015
Taking Up
by: Mike

What a beautiful boat!!!!

My advice, for what it's worth, is to not worry about the fastenings until you have used her for a season.

That will give you time to see how bad the leaks are.

I'd happily put up with wet feet just to drive around in such a gorgeous boat.

It may be that just a few of the fastenings need replacing/'tightening' or perhaps just an extra screw or nail added where needed.

Replacing the rivets and roves will need two people as you say, one inside and one outside the boat.

I'm assuming that she is riveted and not clenched.

By all means use some 'cooking fat' on the outside of the seams but don’t be tempted to fill the seams with anything that is either sticky or goes hard (silicon sealants or god forbid, epoxy).

The idea of the cooking fat is that it will seal the seams but be easily squeezed out as the timbers swell, 'take up'.

Or you could use soap, bar soap softened by soaking, you might have a frothy wake but it will smell better then lard.


Jan 02, 2015
The Norwegian way
by: Tina

The previous owner said it would involve two people, one on the inside and one on the outside with a bit of wood and a big hammer, so I wasn't expecting it would be so complicated.


Jan 02, 2015
tightening clinkers
by: Peter Murton

The only way to tighten clinker boats is to pull out all the old fastnings one plank at a time carefully clean out joint to clean timber then re-fasten with the next gauge up copper nails and roves.

First find the leaks if they are on the stem hog or around the transom check the screws are still intact as a lot have brass screws and they only last 10-15 years.

Dont try and pull the old screws out just put new silicon bronze ones between the old ones.

Face book Murtons Timbercraft


Click here to add your own comments

Join in and write your own page! It's easy to do. How? Simply click here to return to Your Questions and Answers.

Want to add more photos?

Photo Uploader

If you are having problems uploading Photos or would like to add more click on this link for the Upload Form.