- Home
- Ropes and Rigs
- Rope Types
- Whipping
Whipping Ropes and Lines.
There
are numerous whipping methods most use twine tightly wrapped many
times around the rope close to its end.
With many of the modern synthetic ropes you can simply melt together the ends to prevent them fraying.
The ends can also be taped, however tape can soon becomes ragged, breaks and then allows the rope to fray.
PVC
tape is fine just for wrapping around the rope to contain
the strands prior to cutting it.
However, a whipped-end is not only the best looking way to finish a rope end but if done properly it will outlast other methods.
A
common whip is fine in most cases but for lines which require a more
secure, longer lasting end the sailmaker’s whip is more robust.
Common Whipping
Of the several methods used for binding a line end, the easiest to do is the common whip.
This
doesn't require any tools and can be used with either three-strand or
braided line, but it does have the disadvantage that if handled often
it can become loose and slip off.
The video below will probably give you a better idea of the process.

However, the basic steps are to start with a loop of the twine that is
at least twice as long as the diameter of the rope.
Lay the loop along the rope with the loop toward the bitter end of the rope and the short end extending down the length of rope (standing end).
Begin wrapping the twine around both the rope and the bight in the twine, starting from the base of the loop, leaving the end of the loop showing.
Pull each turn tight and snug as you go along.
Keep winding until close to the end of the loop.
Cut the twine with then slip the end through the loop.

Now if you pull on the short end of the loop this should pull the cut
end of the twine through under the windings.
Finish off with a buried reef knot.
You
can finish with several reef knots or half hitches then pull these
through the rope or under the bindings with a needle so that they are
neatly buried.
Trim the line close to the whip and if using synthetic rope melt the end as well.
affiliate linksSailmaker's Whipping

The Sailmaker's-Whip is more secure because it is ‘sewn’ into, rather
than just wound onto, the rope.
Again, there are many different variations on this basic theme.
Essentially, the binding turns are held in place by frapping turns which both grip the rope and prevent the whipping from unwinding.

This
method can be used on
braided as well as three stranded rope.
It
is possible do a sailmaker's whipping on three stranded rope with out a
needle by opening the strands to pass the twine around them.
However, a large sailmaker’s needle will make the job easier.
I prefer to use my
‘Speedy Stitcher’, the large wooden handle makes
it so much easier to handle and apply leverage.
With three strand rope it is easy to decide where to lay the frapping
turns, along the groove between the rope strands.
Three frapping turns is also normal with braided rope just take care to place the frapping turns evenly around the binding.
On
smaller braided ropes just
two sets of frapping turns on opposite sides is quite acceptable.
With three strand rope begin by separating the strands of the rope for
approximately twice the rope diameter.
Form a loop in the whipcord then pass this over one of the rope strands.
The short end of the twine should then be wound inside the windings
along the groove between the rope strands.
When
you have sufficient windings use either a fid to lift the strand of the
rope or the ‘Speedy Stitcher’ to reeve the twine under the rope strand.
Pull the twine tight.
Lay
the twine over the original groove between strands, then pull the twine
between the ends of the rope strands so that the twine is around the
rope strand to the left of the original groove.
Pull the twine tight.
Use
the fid or ‘Speedy Stitcher’ to reeve the ends of the twine behind the
next strand to the left at the other end of the whipping.
Pull the twine tight.
When you have done all three strands bring the tail of the twine to the
end of the rope.
Finally tie a reef knot or two using the tail and working ends of the
twine.
Then knots are pulled through the rope to bury the ends.
Use
the same technique with braded line except that you won’t be able to
separate strands with a fid but will have to use a needle to ‘sew’ the
frapping turns.
With braded rope you won’t have the twist of the
strands as a guide so you will have to be careful to keep the frapping
turns equal.
Trim the strands of the rope close to the whipping.
It is still a good idea to melt the ends of synthetic rope as an
additional precaution.
The sailmaker’s-whip takes a little more time and practice to master,
however it is well worth the extra effort.
Not only is it more secure but it looks more ship shape.
West Country Whipping
This is not strictly speaking a whipping
but merely a series of
overhand knots finished off with a reef knot.
It
is not particularly secure but it is quick and easy to learn and will
hold until the end is properly finished off with a better method.
Start with a ‘constrictor knot’, then working away from the bitter end tie a series of overhand knots and finish with a reef knot or two, which can be pulled through the rope to bury it using a needle.
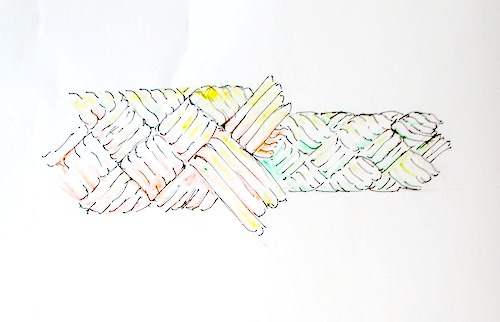
affiliate linksBack Splice
Splicing is a very ancient art, which done neatly creates a beautiful effect.

A
back
splice at the end of a three strand rope is very secure and
seamanlike.
One possible drawback is that a splice does increase the diameter of
the rope end, which will make it difficult to feed through blocks and
such like.
The
back splice is started by separating the strands and then
making a
‘crown’ to redirect the strands back towards the standing end.
The strands are then braided into the standing strands for at least
three complete ‘tucks’.
The back splice looks splendid on mooring lines but for other lines which may need to go through blocks a whipping is preferable.
NATIVE ASYNC


Recent Articles
-
Wooden Boat Events 2024
Apr 14, 24 05:15 AM
Wooden Boat Events 2024 calendar, traditional and classic boat festivals and regattas from around the world
"Prevention is, as in other aspects of seamanship, better
than cure"
(Sir
Robin Knox-Johnston)
You might like these
Ropes and Rigs for Boating.
Boating ropes and rigs, knots, sailing, line handling and line care, what all boaters need to know.
Splicing Three Strand Rope.
Splicing, tips and techniques, three strand eyes and rope ends, make your own dock lines why pay for something you can easily do yourself.
Rope types
Rope types, what types, construction and materials to use on your boat when to use three strand and braided marine lines.
Knots for Sailors.
A brief description of and how to tie some of the most useful boating knots. Including some that every boater should know.
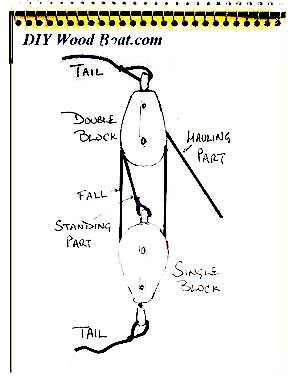
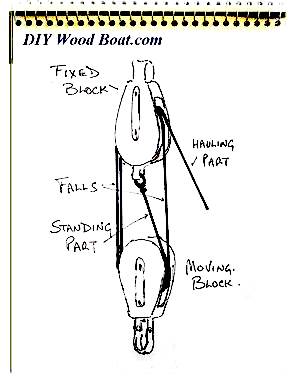
Handy Billy a traditional rope and sheave rig.
A Handy Billy made with two blocks and tackle can be used to give mechanical advantage wherever needed.
Blocks and Tackle lines and sheaves.
How Blocks and Tackle work to give mechanical advantage and how best to rig them.


Recent Articles
-
Wooden Boat Events 2024
Apr 14, 24 05:15 AM
Wooden Boat Events 2024 calendar, traditional and classic boat festivals and regattas from around the world -
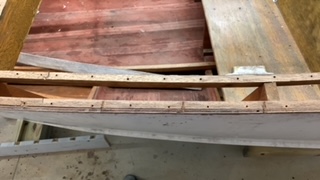
14’ 1956 Chris Craft, side rail how should it be attached?
Apr 12, 24 03:38 AM
 Removing the old side rail most of the screws went between the top deck/skin 1/4” plywood and the side of the hull. See photo, is this correct? I would
 -
How to laminate plywood on the hull
Apr 10, 24 03:46 AM
I'm working on replacing the bottom of 18' 1969 runabout that has a deep-V plywood hull. It had a 1/2 mahogany plywood bottom that they somehow got to
You might like these
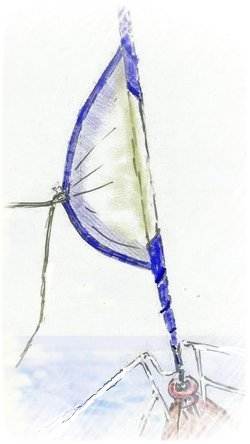
The Dipping Lug Sail
The dipping lug sail, is perhaps the most efficient and cheapest, type of sailing rig especially for small sailboats however it isn't as handy as the standing lugger or the balanced lugsail.
UV Strip for Furling Sails
UV Strip, notes on repairing, fitting and replacing a sacrificial UV protection strip on furling sails using acrylic or UV protected Dacron.
Sailing Rigs, a Guide to Sail Shapes.
The basic shape of the Sailing Rigs most commonly found on wooden sailing boats of every size.
Sail Cloth
About sail cloth and the different materials for DIY sail making and the average leisure sailor.
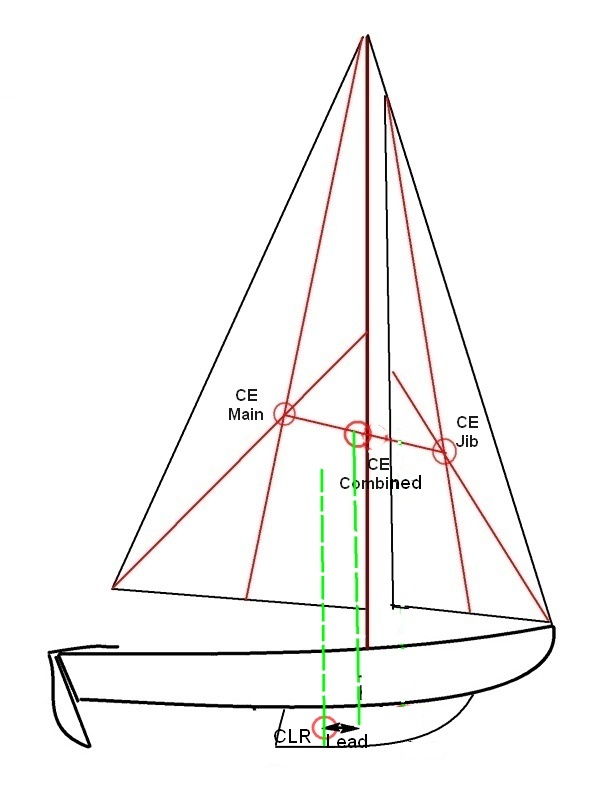
Sail Balance
Notes on Sail Balance, designing a sailing rig, how set the relationship between the center of effort and the center of lateral resistance.
Lug Rigs for large and small sailboats.
Sailors have been using Lug Rigs for centuries because of their unique sailing abilities.
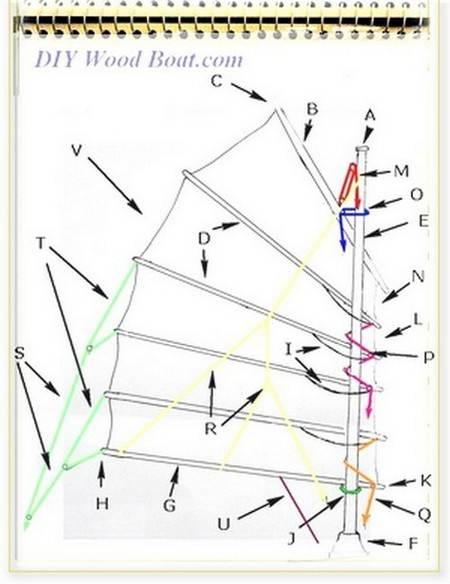
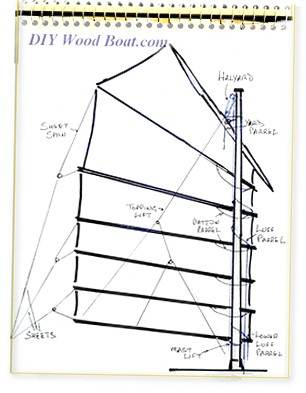
Junk Rig the ideal cruising sail.
How to rig a western version of the Chinese Junk Rig the basic lines and controls.
Junk Rig, How I Made My Own.
Junk Rig Sails How I built and rigged Mignonne with a Juk Sail
Junk Rig Conversion
Structural considerations for a Junk rig conversion of a wooden boat from bermudan rig to junk sail, where and how to site the mast.
Chinese Junk, the perfect cruising rig.
Chinese junk sail, why I rigged Mignonne with a Jukn Sail


This work is licensed under a Creative Commons Attribution-ShareAlike 2.0 UK: England & Wales License.
I am perfectly aware that the majority of Wooden Boat aficionados are sensible folk.
However, I need to point out that I am an amateur wooden boat enthusiast simply writing in order to try to help other amateur wooden boat enthusiasts.
And while I take every care to ensure that the information in DIY Wood Boat.com is correct, anyone acting on the information on this website does so at their own risk.