- Home
- Your Boats
- Salty
"Salty" a Harkers Island Net Boat.
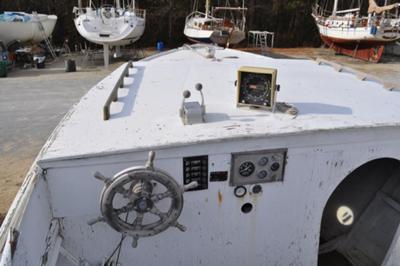
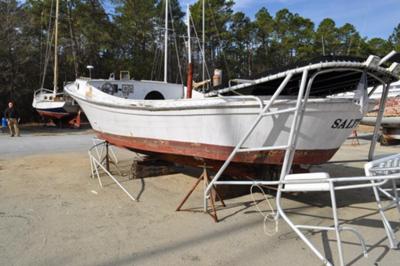
This is Salty my new /old Harkers Island Net Boat and the story of her restoration.
by Alan DeForest
(Wilmington, NC, USA)
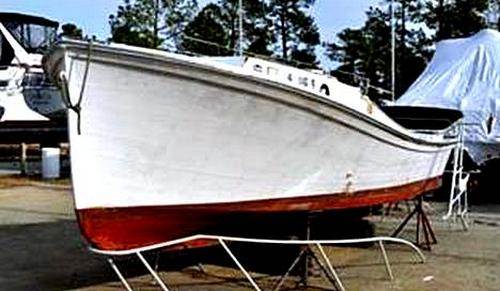
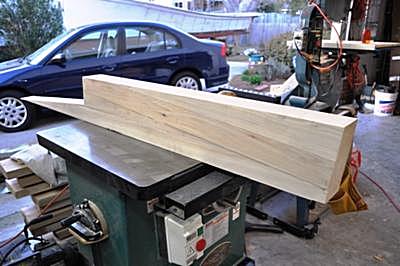
She is a 1960 Vintage Wooden Boat 26' LOA and 9' Beam.
Just got the bill of sale today and now I have to figure out how to get her home.
Two friends have volunteered trailers.
And I'll have to build some kind of bunk.
I'll be needing a diesel for it - probably about 40HP, but I need to research that further.
Pick Up Day for Salty
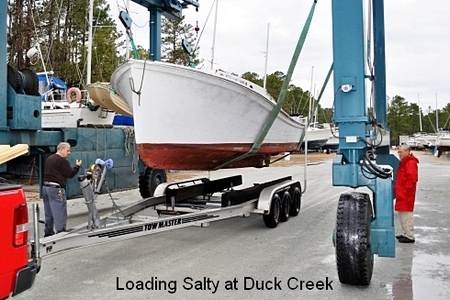
My son and I went to Duck Creek today to pick up my project boat.
The guys at the yard were great at helping shore up the boat to the trailer fitted for another boat.
After getting it secured the pull home was flawless.
I really appreciate the use of the trailer.
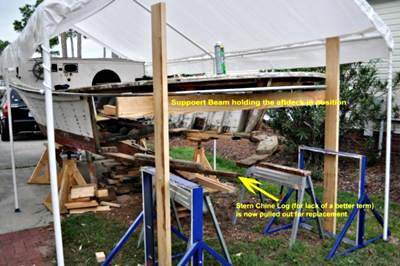
Tomorrow it will be interesting getting her on to the stands.
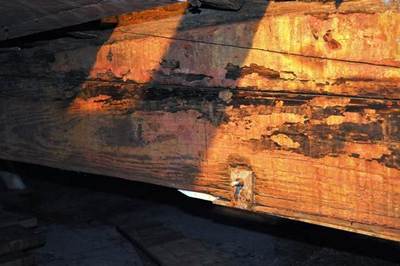
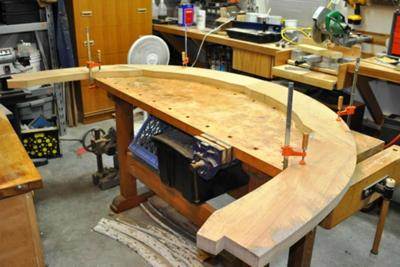
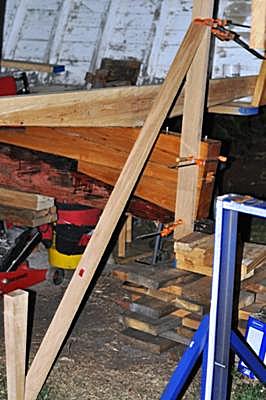
Peeling Away the first Layer
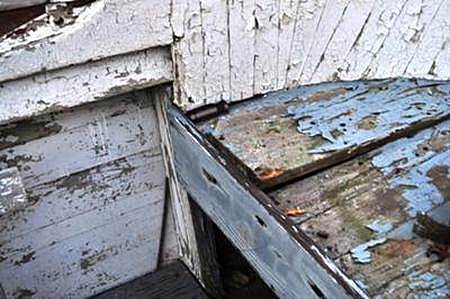
She is on the stands at least the stern is and I started taking measurements, and photos so we can put it back together.
Trailer should be out tomorrow.
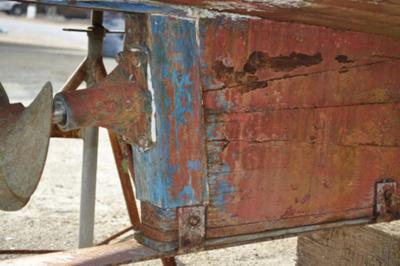
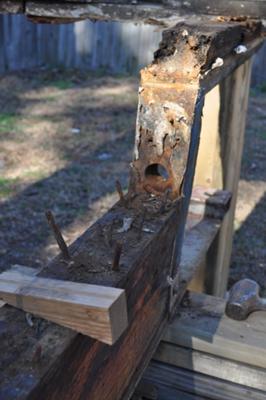
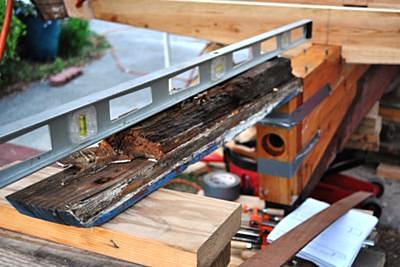
Yes, boss there is a bit of rot.
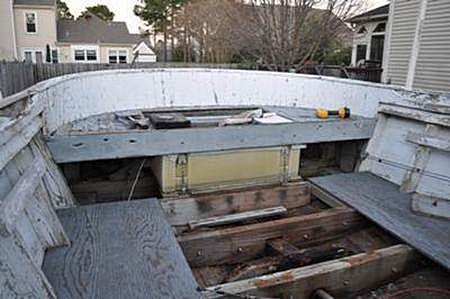
The good thing is the structure is fairly simple and nothing is beyond the capabilities of my garage shop.
Should have the measurements and sketches put together in a week or so.
Then the bill of materials and more dissecting.
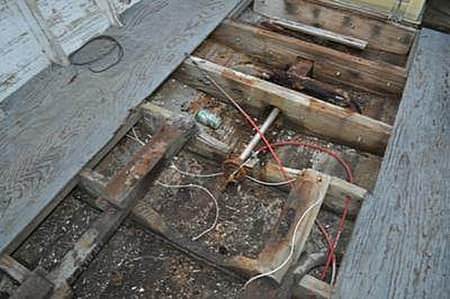
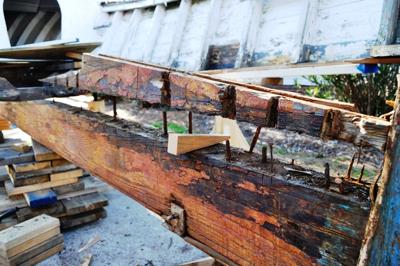
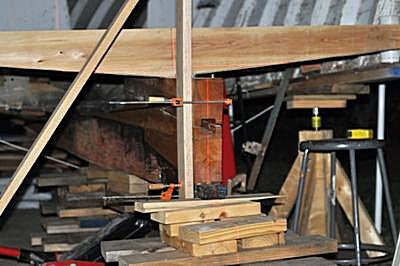
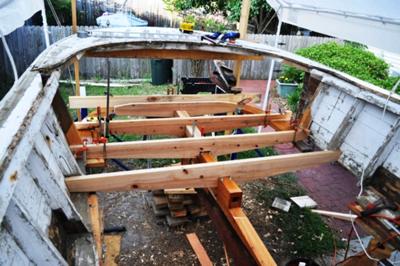
Moving forward on Salty
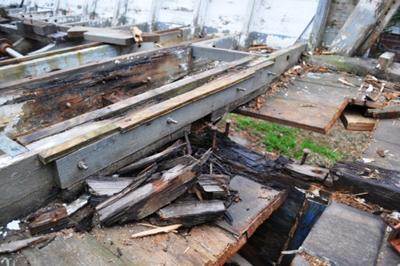
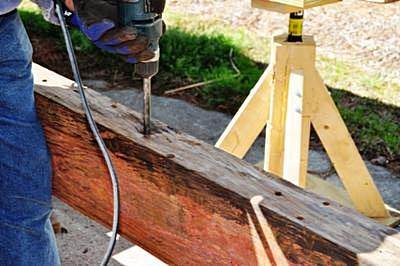
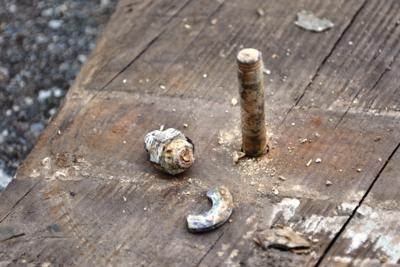
We are moving forward on her by pulling the rudder and steering hardware along with one frame to get a look at the shaft log.

Of course we found it had rotten
extensively
with at least one drift corroded to a sharp point.

We are going to replace the entire
shaft log
which is a big job, but we’re up to it.
The pictures tell the story with all the gory details.
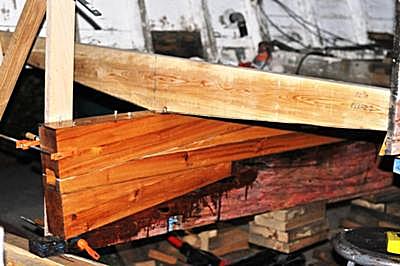
There are going to be about 11 frames
to replace and the
entire bottom.
Looks like the sides above the waterline will stay.
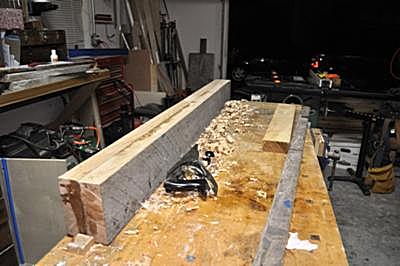
We chose yellow pine for the frames since we are going to epoxy all the surfaces.
Yellow pine is strong enough and readily available at a reasonable cost.
Keeping up the Momentum
I try to do a bit every day to keep the momentum.
We have isolated the shaft log and see that they used two pieces and probably just put a dado down the middle.
In this sequence I have pulled the garboard and several planks out from the transom to a few stations forward.
I also just outlined the shaft log by running a saw in the
seam and finding where the drifts are lurking.
Next is to pull the floor timbers and then pull the log.
At first I was pulling nails and screws holding the planks.
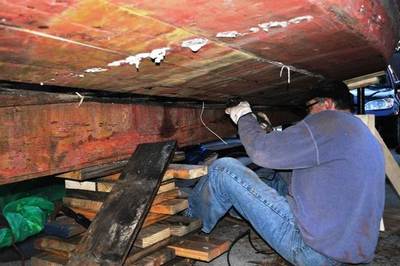
It wasn't long before I was cutting at the floor timbers and
just
ripping them out, there's no time to be delicate and Salty will just
have to bear down and bite a bit of stem.
It won't be long before she has a bone in her teeth while plying the
Intracoastal Waterway.
When tearing into a boat this deep you need to watch the support of the structure so it doesn't hog or worse fall on you.
I'm constantly checking and re-evaluating the supports.
We built our own stands since even used stands would have cost $200.
We did it for about $70.
There are intermediate supports placed to hold the shape.
It probably would be better to work on it upside down (the boat of course, not me).
Another issue was to get a lead paint test kit and to my relief no lead was detected.
There is plenty of dust generated with almost any task.
I'll be doing the same stuff for the next few days so I'll update after we get the log out and prep the keel for the new one.
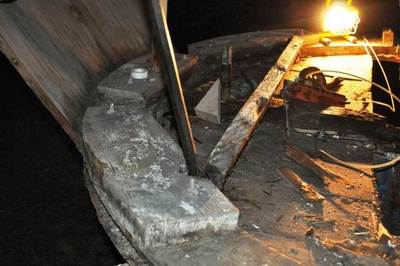
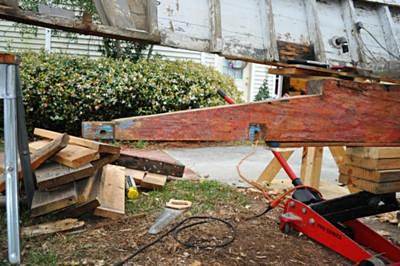
Working on the Shaft Log
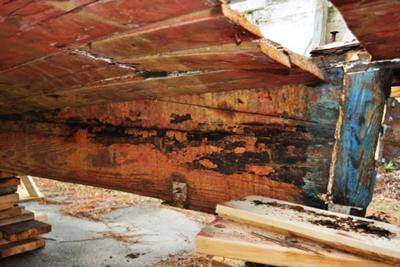
I have been working on the shaft log finally getting both halves out.
 Shaft log
bottom was wedged up revealing the drifts
Shaft log
bottom was wedged up revealing the drifts
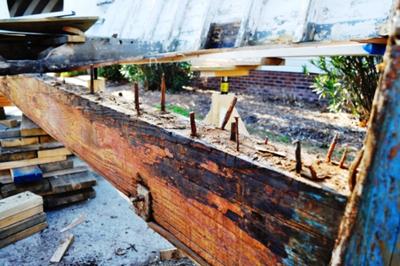 Drifts are
tough
Drifts are
tough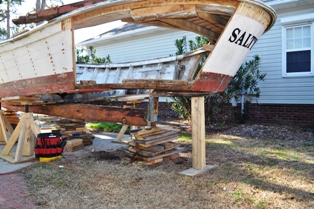 Stern opened
up and shaft log removed
Stern opened
up and shaft log removed
 Rot behind a
floor frame at stern
Rot behind a
floor frame at stern
 Stern post
after shaft log removal
Stern post
after shaft log removal
I have glued
up the material for the log blanks and I'm ready
to trace the shapes and cut them out.
 Checking
the chip flow
Checking
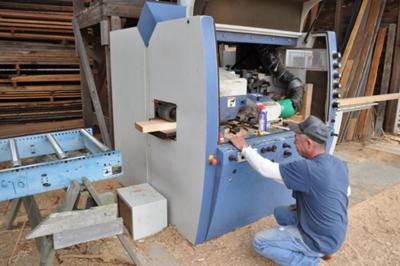
the chip flowI found cypress at a mill about 80 miles from here but it was worth the ride.
I included a picture of the sawyer planning the rough cut
lumber to size.
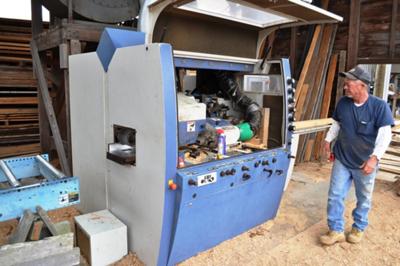 Watching the board feed
They were very helpful picking out boards and sizing them to just what I wanted.
I have made templates for about 5 frames and hope to get those in as soon as possible to keep the hull shape.
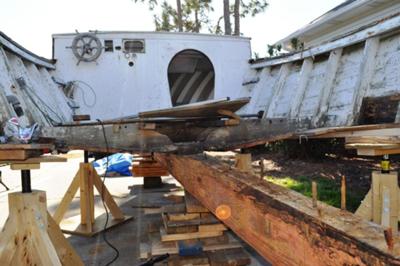
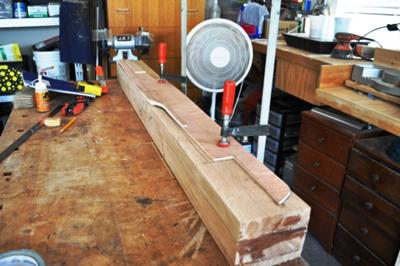
Salty Update 03/11/2011
 Blank
Ready for Tracing
Blank
Ready for Tracing
This past weekend was relatively productive.
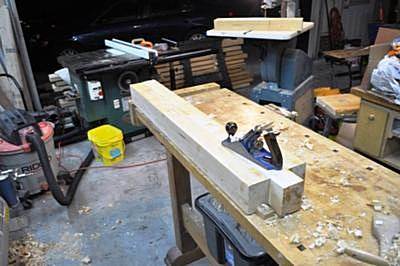 Hand
Planning Shaft Log to
Width
Hand
Planning Shaft Log to
WidthThe hand plane, chisels and hand saw were extremely useful to get this work done not everything lends itself to power tools and it’s satisfying to know you can do it by hand.
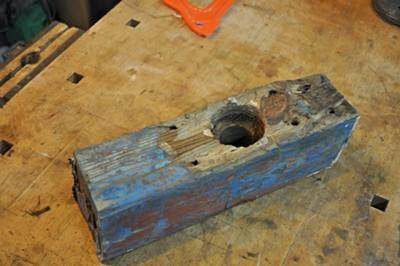
 Shaft
Log Ready for Shaft,
Dado, and Bolt Holes
Shaft
Log Ready for Shaft,
Dado, and Bolt Holes The shaft log is fitted and ready to fasten to the keel and we
will be
able to work the horn timber in and set the stern fair.
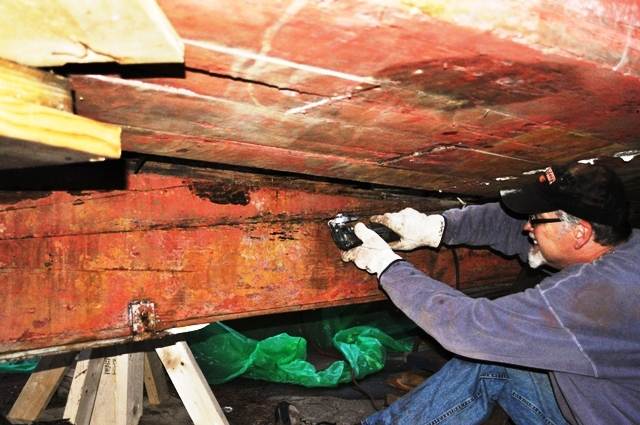
 Coring
Out Old Drifts
Coring
Out Old DriftsAfter using a homemade coring tool the remainders of all the drifts and the odd nail have been removed, plugged and faired.
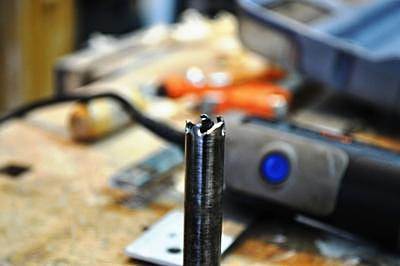 Coring
Tool
Coring
Tool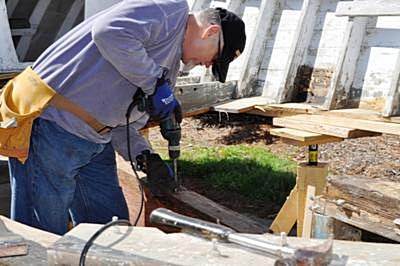 Guiding
Coring Tool
Guiding
Coring Tool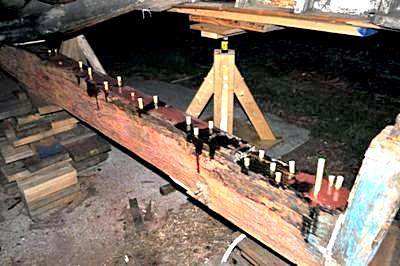 Old
Drift Holes Plugged
Old
Drift Holes PluggedWith this completed the shaft log fits tight to the keel and flush with the existing stern post.
The existing stern post will be replaced along with what is
left of the horn timber.
I hope to have this completed by the end of this coming weekend.
Salty Update 3/18/2012
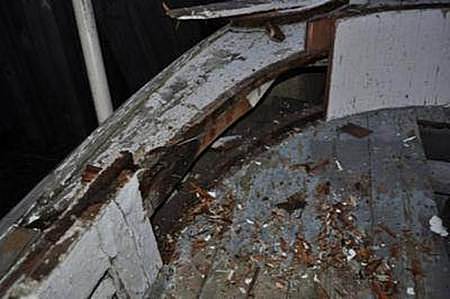
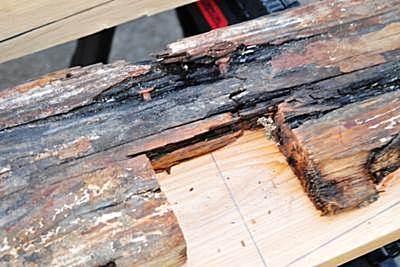
 Keel End Damage
I've gotten to the point of pulling off the stern post and saw what I was expecting.
The End of Salty's
keel is in pretty bad shape.
 Section of Keel Removed
It looks like there was some marine borer at work and a lot of checking and splitting.
 Section of Removed Keel
I decided to just excise the end and rebuild it.
 Stern Post
Removed
Stern Post
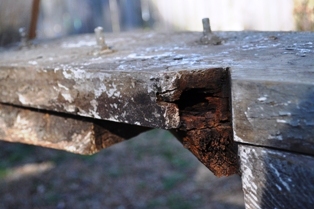
RemovedI’ll re-bore a new piece to replace "Salty's" stern post.
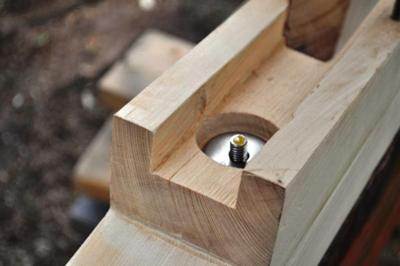
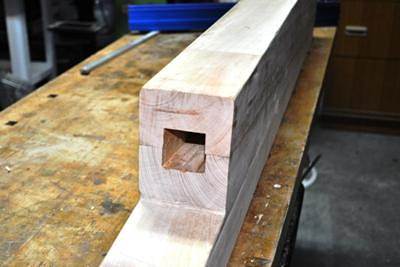 Shaft Channel Cutout
The shaft log has its passage cut to accept the shaft tube.
Salty Update 3/29/2012
 I
have
fitted the replacement section of the keel and faired it in to accept
the shaft log.
I
have
fitted the replacement section of the keel and faired it in to accept
the shaft log.
The stern post is roughed out and ready to fit.
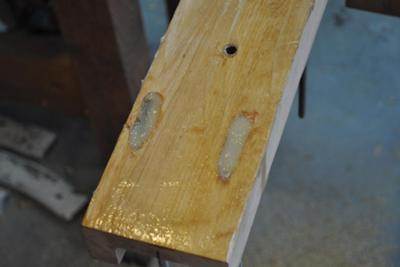
Today the stainless fasteners came in to bolt the shaft log in place and I have my extra long augers ready to go.
I used a laser level to check the position of the shaft log to the keel and rest of the boat and it looks like everything is lining up OK.
 I have also picked up the white oak for the stern
chine and
the old chine will be traced for best fit to the planks.
I have also picked up the white oak for the stern
chine and
the old chine will be traced for best fit to the planks.
Great deal on the wood through Reid Boat Building, a local boat builder.
He is interested because he rebuilt a similar 36ft Harkers
Island and he just likes to see a wooden boat come to life
again.
It should be a productive weekend with plenty of materials and a full head of steam built up in a cubicle all week.
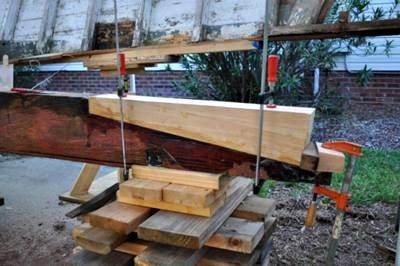
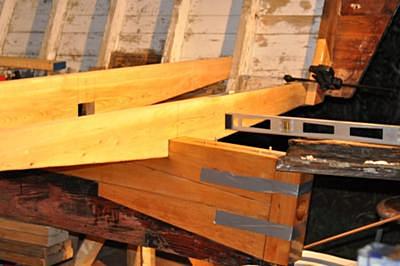
Salty Update 4/4/2012
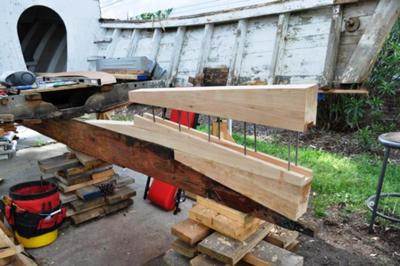
 L Bolts in Place
Made some progress on the stern this past weekend.
 L Bolt Slots Epoxied
The bad section of keel has been replaced and the shaft log is
fitted up with the boltings and ready to be coated, bedded and then
fastened.
 Lower Shaft
Log with Bolt Fitted
Lower Shaft
Log with Bolt FittedThe shaft log will need a tube and then the stern post will get fitted.
 L
Bolts Line Up with Upper
Shaft Log
L
Bolts Line Up with Upper
Shaft Log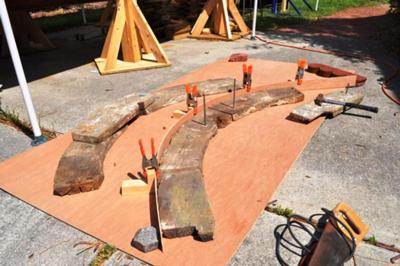 Layout
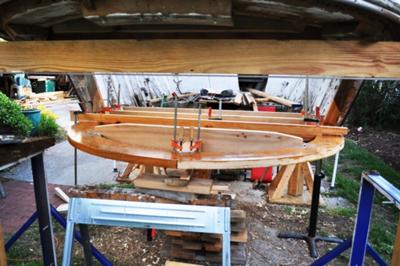
of Stern Templates
Layout
of Stern TemplatesThe tracing of the stern chine is completed and the rough parts are cut out of white oak.
They are layed out on the bench and the joining method is
being considered.
 Fitting
Up Stern Chine
Fitting
Up Stern ChineNot totally sure how to do it but I might blind spline and epoxy with a fish plate over the joint and bolted.
It'll be a bit sturdier than the original.
On top of the shaft log will be fastened the horn timber to
support the stern.
Got it in my head how it will go and I'll go over the measurements I previously took to lay it out on paper.
Should go OK.
Probably be bolted into the upper half of the shaft log.
After the stern gets set up then it's onto replacing the floor frames I have already roughed out.
 Corroded
Brass Bolt in Stern
Chine
Corroded
Brass Bolt in Stern
ChineDon't Use Brass Fittings!

Corroded Carriage Bolt
I got to tell you one friend said I should just jack up the name plate and put another boat under it.
It just wouldn't be the same, beside the "Salty" name plate was too rotten!
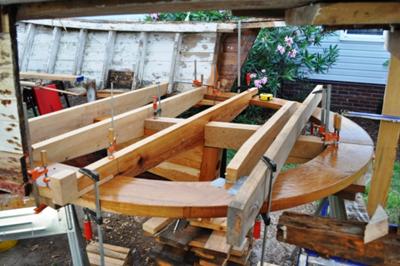
Easter Weekend Work Update for Salty
 Frame
1 Matched Up Break
Frame
1 Matched Up BreakGot in an extra day with the Friday off and it was good.
Picked up some seal sealer from Reid Boatyard that Richard had kicking around and discussed my boat plans.
Always an interesting conversation with a guy possessing a
wealth of knowledge and experience.
 Layout
of Frame 1
Layout
of Frame 1On the sawdust side the first 6 frames are rough cut and the shaft log is ready to finally fit up.
 Ring
Timbers with Epoxy Coating
Ring
Timbers with Epoxy CoatingThe parts I now call the ring timber (I ran across the term on the internet in a section about the evolution of the elliptical stern) are ready to fit up.
If anyone has a better term for this part let me
know.
Now it's time to fit the parts together to make the stern of "Salty" come to life.
 New
Stern Post
New
Stern PostUsing clamps and supports the pieces will be positioned and the horn timber is then ready to be shaped.
I have parts of the original but it was so badly rotted the
forward end tapered off into nothingness.
When I start fitting up the floor frames I'll be cutting off the ends of the side frames that have rot.
Just a simple scarf to restore the lower ends.
Salty Update 15 April
 Keel Twist BracePretty busy weekend
here in Wilmington, NC being
the Azalea Festival and all so I
didn't get a lot done, but a little bit is OK too.
Keel Twist BracePretty busy weekend
here in Wilmington, NC being
the Azalea Festival and all so I
didn't get a lot done, but a little bit is OK too.
Great garden walks , fireworks and street vendors. I went on my first US Coast Guard Auxiliary patrol to set up a safety zone in the Cape Fear River for the fireworks.
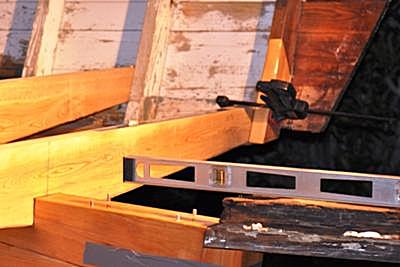
Picked up the bedding compound on Friday and set the lower shaft log and bolted it up.
Temporarily put the upper half in place to set up Frame 0 and the horn timber.
Set up the laser again and checked for level and made some adjustment by wedging up the port side.
This caused a problem with the keel to show up.
There is a slight twist in the keel, not much but enough to
bug me.
 Pushing Twist out of Keel
I set up a lever arm on the keel and bracing it from the ground pushing the twist out.
 Shaft Log in Place
I'm taking my time now to watch the alignment and get the stern lined up properly.
Relying on my measurements and fairing it out by eye.
Salty Update 19 April 2012
 Duct Tape Is Awesome
Started to fit the frames in place and figure the horn timber position.
A roll of duct tape came in handy to hold the stern post while
the old horn timber is placed in position.
 Checking
Old Horn Timber Position
Checking
Old Horn Timber PositionThere was only a portion of the timber left to salvage but it holds the most important dimensions.
 New Horn Timber Blank
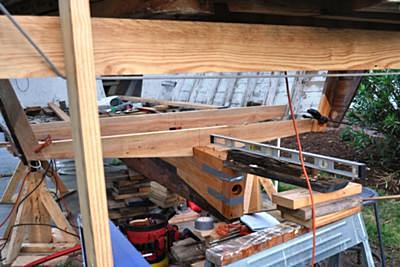 New Frame Set Up
The forward end will butt up against the next frame and bolted in place to the frame and the top of the shaft log.
 Photo
Showing Scarf for Side Frame Bottom
Photo
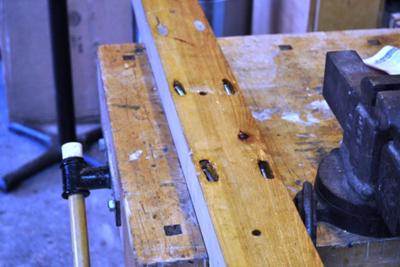
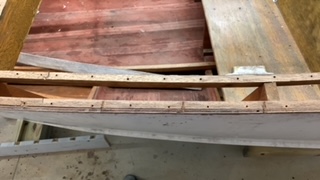
Showing Scarf for Side Frame BottomEach side frame bottom will need replacing and I'll scarf pieces in place as shown in the photographs.
I think I have enough duct tape to piece it all together and then start bolting up the ring chine, horn timber, stern post and the frames.
"Salty" coming along pretty smartly.
Update for May 4, 2012
 Laying
out the Horn Timber
Laying
out the Horn TimberIt's been a while, but there were only bits and pieces and nothing was ready to come together.
I have now dry fitted a number of pieces and it's starting to look like it'll happen.
It
took a bit to get the blank ready for the horn timber and
several iterations of a template and presto a horn timber.
 Looking
Aft from the Cuddy
Looking
Aft from the CuddyAs can be seen in the pictures there are a few clamps keeping it all together.
There are still some fitting and adjustments I need to
make.
 Ring
Timber Temp Clamped to
Horn Timber
Ring
Timber Temp Clamped to
Horn TimberTracing the original parts left some dimensions off mostly due to the amount of sister frames and Dutchman's.
 View
of Stern
View
of Stern
As soon as the stern is aligned I'll start bedding, caulking and bolting everything together.
I had a wooden boat building instructor friend over on Sunday to take a look at the work so far for a critique.
I find out he actually spent time on Harkers Island with the builders and was very informative about the methods I'm using and how the boat was originally put together.
He had a look at the planks I thought needed replacing and said they were fine.
That
was good news to me for every piece I don't have to replace not only
saves money it gets the boat closer to launch day.
Alan DeForest
NATIVE ASYNC


Recent Articles
-
Wooden Boat Events 2024
Apr 14, 24 05:15 AM
Wooden Boat Events 2024 calendar, traditional and classic boat festivals and regattas from around the world
You might like these
Woodboat Restoration questions forum
Woodboat restoration questions Forum, get advice about your Wooden Boat problems in a free, no frills, no need to sign up forum
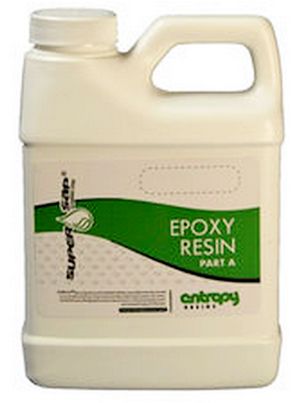
Epoxy Resin for DIY Wooden Boat Building.
A guide to the epoxy resins and sustainable enrtopy resins to use when building wooden boats with marine plywood.
Wood Rot Repair and Treatment
Wood rot in wooden boats, how to treat, repair and replace rotten timbers in a wooden boat


Recent Articles
-
Wooden Boat Events 2024
Apr 14, 24 05:15 AM
Wooden Boat Events 2024 calendar, traditional and classic boat festivals and regattas from around the world -
14’ 1956 Chris Craft, side rail how should it be attached?
Apr 12, 24 03:38 AM
 Removing the old side rail most of the screws went between the top deck/skin 1/4” plywood and the side of the hull. See photo, is this correct? I would
 -
How to laminate plywood on the hull
Apr 10, 24 03:46 AM
I'm working on replacing the bottom of 18' 1969 runabout that has a deep-V plywood hull. It had a 1/2 mahogany plywood bottom that they somehow got to


This work is licensed under a Creative Commons Attribution-ShareAlike 2.0 UK: England & Wales License.
I am perfectly aware that the majority of Wooden Boat aficionados are sensible folk.
However, I need to point out that I am an amateur wooden boat enthusiast simply writing in order to try to help other amateur wooden boat enthusiasts.
And while I take every care to ensure that the information in DIY Wood Boat.com is correct, anyone acting on the information on this website does so at their own risk.